Vehicle Wraps: 12 important steps for success
by all | 4 February 2013 8:30 am
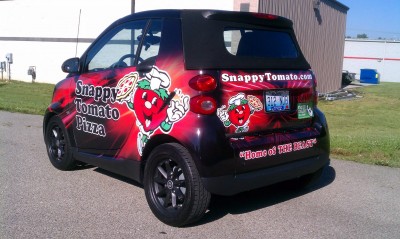 [1]
[1]Photo courtesy Digital EFX Wraps
By Matt Richart
Vehicle wraps continue to grow in popularity, as more and more businesses discover the power and effectiveness of taking their advertising and marketing messages ‘on the road.’ Sign shops throughout Canada have noticed the increase in demand, with many widening the spectrum of services they offer to include vehicle wraps, while those shops that already specialize in wraps are growing their business, adding staff and equipment to accommodate more projects.
Achieving success in this specialized and competitive field, however, will depend on ensuring the high quality of each and every wrap performed, including both visual appearance and durability. The following 12 steps should be taken to help satisfy customers and avoid costly mistakes.
1. Size up the job and take photos
To ensure an accurate quote for a wrap job, the customer’s vehicle should be brought into the shop in advance, to be photographed and measured.
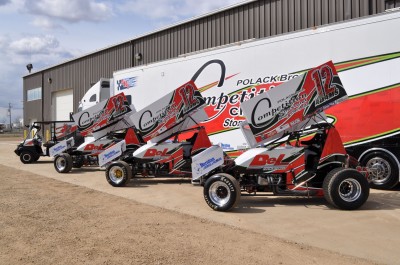 [2]
[2]DC Signs & Designs in Leduc, Alta., has also wrapped race cars for local client Adams Racing. Photo courtesy DC Signs & Designs.
The photos should include direct shots—i.e. never taken at angles—of the sides, hood, rear, roof and bumpers. Customers are sometimes indecisive as to which part of the vehicle they want to wrap, so having these photos as a reference can save time and aggravation.
Exact measurements should be taken of the height and width of the sides of the vehicle, as well as the hood, rear, roof and bumpers. An extra measurement, such as a door, will help properly scale the graphic.
Attention should be paid to all ‘body breaks,’ keeping in mind how to print the required panels for eventual installation. The vehicle’s contours, body accessories and paint condition should also be inspected.
If the actual vehicle is not available to be measured in advance, professionally prepared vehicle outline templates may be used instead.
2. Understand the reasons behind the wrap
Before starting any job, it is important to understand the nature of the customer’s business and what it hopes to achieve by having the wrap installed. The sides of the vehicle will act like a moving billboard, illustrating a trade or a product, and for this visual message to be effective, it should be designed with an understanding the message the customer wants to communicate.
This will require a meeting with the customer to get as much information as possible. The most important question to ask is, “What is this wrap going to advertise?” The answer could be a product, service, brand or corporate image—or the wrap could simply be intended to capture attention.
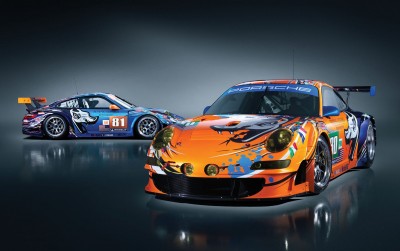 [3]
[3]Not all wraps serve as ‘moving billboards’ to advertise a product or service. These race cars were wrapped by Iconography Studios for the Flying Lizard Livery to celebrate Porsche’s history with the annual 24-hour race in Le Mans, France. Photo courtesy Iconography Studios
3. Set customer expectations
While customers do not need to become vehicle graphic experts, there are some logistical issues they will need to understand about their wraps. They should be informed about the expected life-cycle of the media, for example, including the media supplier’s warranty policies. And it is a good idea to walk around the vehicle with the customer and highlight any areas with potential problems or where graphics may need to be relief-cut or seamed.
It is also a good idea to provide a ‘care sheet’ to the customer with each wrap, listing ways they can help extend the useful life of the graphics, including suitable washing techniques, restoration products and storage measures.
4. Inspect the vehicle
When the vehicle is being checked over with the client, this is an opportunity to inspect it completely for any problem areas, such as faulty or defective paint jobs, which can result in damage when the wrap is eventually removed.
To protect the sign shop from being blamed for any such problems, the inspection report should be reviewed with the customer, making him/her aware of any potential challenges, and then signed by both parties, to be kept on file.
5. Consider the difficulties of the wrap
Any complexities in the nature of the vehicle can affect a job’s requirements in terms of wrap material printing and installation time. These complexities could include extreme curves, rivets, door handles and other protruding parts.
By considering any expected difficulties early on, the wrap can be designed around the problem areas, saving time on installation and avoiding the need to reprint any graphics.
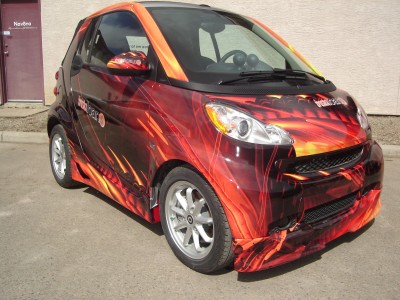 [4]
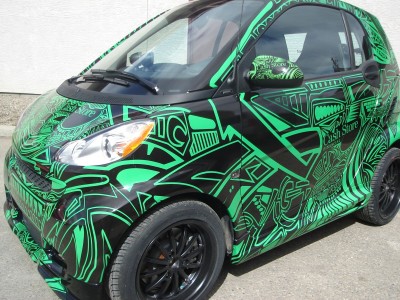
[4]Spy Design in Okotoks, Alta., has wrapped a series of Smart cars in bold colour schemes. Photos courtesy Spy Design
 [5]
[5]6. Price the job
There are several important factors that should be kept in mind when pricing any wrap job, including:
- Design work.
- Production time required.
- Square footage of material used.
- Installation time required.
The customer’s budget should always be kept in mind when designing the wrap, to ensure it will be feasible at the appropriate price.
7. Design and size the wrap
If the job will be a full vehicle wrap, the design will need to be broken down into print panels that scale to the exact measurements of the vehicle in question, using detailed notes, photos, measurements and the aforementioned extra measurement to double-check the accuracy of the layout. Once these panels are accounted for, the wrap design can be created based on solid data and, as mentioned, on the customer’s budget.
8. Get the green light from your customer
When obtaining customer approval for the wrap design’s image and colour qualities, it is important to show samples of the media the wrap will be printed on.
After the artwork has been approved by the client, the files should be saved to a RIP (raster image processor) folder. It is important to get both a signature of approval and a deposit before any printing begins.
 [6]
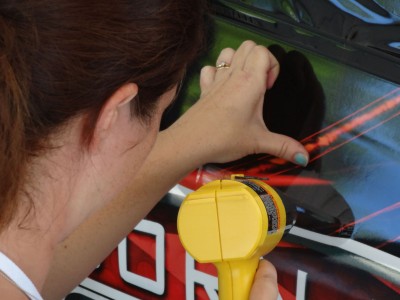
[6]Portions of the wrap will need to be heated to comply with difficult contours. Photos courtesy Roland DGA
9. Choose a panel type
It would be great if every wrap job were seamless, but that is not the reality of the business. At some point in the process, the time will come to panel or seam the wrap. This brings up a crucial decision: whether to use horizontal or vertical panels.
Horizontal panels are larger and need to be laid down on the vehicle starting at the bottom and working up to the top. Once they are on straight, the job is done.
Vertical panels, on the other hand, are smaller and easier to handle during installation, but will need to be dry-fitted to the vehicle before actual application.
The decision between the two is really just a matter of personal preference, but regardless of which panel type is selected, care needs to be taken not to overstretch the seams, as this could compromise the accuracy of the image registration.
10. Inspect and dry-fit the graphics
Producing vehicle wraps in-house provides the ability to control the quality of the printing and lamination steps. At some point, however, a sign shop may instead be hired to install preprinted graphics provided by the client or another company.
For these installation-only assignments, it is very important to ensure all of the necessary graphic panels are present and accounted for. They should also be dry-fitted onto the vehicle to confirm their correct sizing.
11. Install the wrap
This is what it all comes down to—the best design, print and media do not count for anything if they are not also followed by a great installation.
The best installation is one that results in a vehicle wrap without any noticeable seams, bubbles or other imperfections. With this in mind, the quality of the wrap should be inspected by its installer at close range (as that is what the customer will do later, too).
 [7]
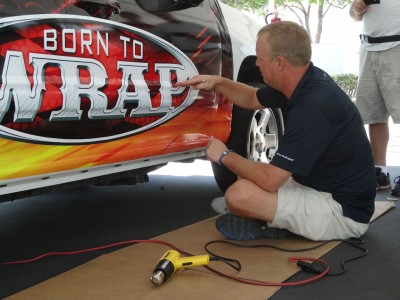
[7]A successful wrap requires attention to detail. Rather than rush the finished product back to the customer, the installation should be double-checked thoroughly.
Most vehicle wrapping media feature some degree of repositionability to help ease their initial tack, so any bubbles can be removed during installation. As the installer’s skills improve, he/she will be able to work successfully with a wider variety of media.
After the graphics are installed, the excess material should be trimmed away, the door panels separated and the door handle and window areas cut out, but taking care not to cut into the vehicle’s paint job, as the customer will eventually remove the wrap.
12. Be detail-oriented
A successful vehicle wrap installation requires precision, with attention paid to all of the details. The panels must be tucked and trimmed properly, for example, or there will be problems down the road. And window perforation films should be laminated to help ensure the safety of the driver during bad weather, providing a clear view outside.
If it is cold outdoors while the wrap is being installed, the vehicle should be kept indoors for an extra day before it is delivered to the customer. A drop in temperature too soon after the installation can result in media failure.
There are other good reasons to keep the vehicle in the shop overnight, too, such as double-checking the tucked areas, deep contours, body lines, window perforation films and any heated or overstretched areas, to ensure they have all been adhered securely to the vehicle surface. And it also provides a chance to catch little things that may have been missed before, like cutting the material over the gasoline tank cap.
Finally, it is recommended to check the wrap six months after the installation for an updated assessment of the image quality and media durability. After all, the wrap is not just a promotional tool for the client—it is also an advertisement for the sign shop that produced and installed it!
Matt Richart is co-owner of Digital EFX Wraps and an instructor for Roland DGA’s ‘Born to Wrap’ workshop series. For more information, visit www.digitalefxwraps.com[8] and www.rolanddga.com[9].
- [Image]: http://www.signmedia.ca/wp-content/uploads/2014/02/IMAG1648.jpg
- [Image]: http://www.signmedia.ca/wp-content/uploads/2014/02/DC-Signs-Designs_Vehicle-wraps-for-Adams-Racing_Image_1.jpg
- [Image]: http://www.signmedia.ca/wp-content/uploads/2014/02/flying_lizard_Iconogrphy_Studios-2.jpg
- [Image]: http://www.signmedia.ca/wp-content/uploads/2014/02/Smart-Car_3_Spy-Design.jpg
- [Image]: http://www.signmedia.ca/wp-content/uploads/2014/02/Smart_Car_2_Spy_Design.jpg
- [Image]: http://www.signmedia.ca/wp-content/uploads/2014/02/DSC00411.jpg
- [Image]: http://www.signmedia.ca/wp-content/uploads/2014/02/DSC00418.jpg
- www.digitalefxwraps.com: http://www.digitalefxwraps.com
- www.rolanddga.com: http://www.rolanddga.com
Source URL: https://www.signmedia.ca/12-important-steps-for-success/