Acrylic Face Mounting: How to make a print really stand out
by | 12 June 2019 8:09 pm
By Steve Yarbrough
 [1]
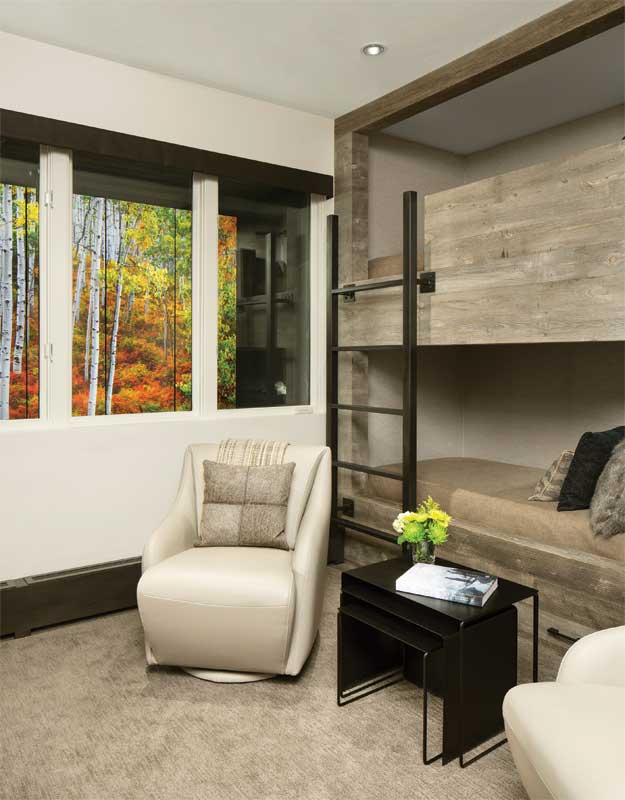
[1]Acrylic face mounting can make a print really stand out, which is an essential prerequisite for fine art and other high-end applications.
Acrylic face mounting can make a print really stand out, which is an essential prerequisite for fine art and other high-end applications. In order to produce a visually appealing output, there are five physical material aspects one must consider.
-
Photo paper or print media
The photo paper or print media plays an important role in the acrylic face-mounting process. One must always use good quality paper for an acrylic print. The most popular print media—and the one which the author prefers for most projects—is metallic paper. Whether it is satin or glossy, metallic paper enhances the vibrancy of a photograph. Not all pictures require metallic paper though; portraits, for example, often produce the best results on a pearl-finish type paper. Every surface has a roughness average (RA) and, the smoother the surface of the photograph, the better the results will be during the face-mounting process. If one does not have a completely smooth surface, they risk getting tiny air bubbles in the print called silvering.
-
Acrylic
 [2]
[2]Cell cast acrylic is harder, has a more uniform thickness, is more scratch-resistant, and is typically clearer than extruded acrylic
Another important aspect for face mounting is the acrylic itself. Not all acrylic is alike: there is cell cast acrylic and extruded acrylic. Cell cast acrylic is harder, has a more uniform thickness, is more scratch-resistant, and is typically clearer than extruded acrylic. Most people in the signmaking industry only use cell cast acrylic for face mounting, regardless of its thickness. There can be slight variance in thickness when dealing with this material; therefore, a laminator that can adapt to these variances definitely helps.
Heat can be used to shape acrylic into a variety of items such as furniture or art pieces. The material is also affected by humidity, which can cause the acrylic to warp, even after face mounting. In such a case, for example, the acrylic starts flat and is fine until after a period of time, when environmental conditions begin to cause damage. Warping is caused by differential moisture absorption on the face of the acrylic versus the back surface, which is covered by the print and, in some cases, a non-acrylic backer and cleat-style hanging. This issue can be resolved by using another piece of acrylic as the backer instead of some other material; however, this would result in a more even reaction to moisture absorption on each side of the mounted print. Similarly, it would create a more even reaction to thermal changes if it were part of the cause.
Acrylic can turn out to be an expensive material.
A single 2438- x 1219-x 19.5-mm (96- x 48-x 0.75-in.) sheet of museum-quality acrylic can cost nearly $4000. While this acrylic type is not required for most projects, one cannot expect to see stunning results with cheap material from a local store. However, cheap acrylic is good to practice with and hone one’s mounting and polishing skills.
-
-
Optically clear adhesive
-
Optically clear material is a two-sided adhesive, which is used to adhere a photograph to the acrylic. The material must be of the highest quality to ensure a clear picture without any distortion. However, products may not be similar to one another; therefore, as a result, one must research the material to ensure it suits their project needs.
-
The backing
This can be the most important piece of a project if it involves hanging the picture on a wall at the end.
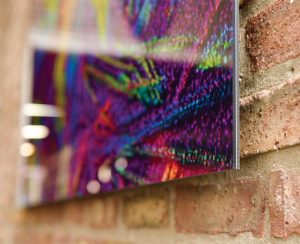
The backing should be able to support the weight of the acrylic—without tearing away from the back of the photograph to which it is adhered—and must also maintain its adhesion to the mounting hardware. Typically, an aluminum composite material (ACM) backing or coloured 3.1-mm (0.12-in.) cast acrylic sheet is used for wall-hung pictures. The composite consists of a high-strength aluminum skin on both sides and compresses a strong polyethylene-centre core. It provides protection to the back of a picture and also serves as a strong substrate for the acrylic to hang safely. Cast acrylic backings are similar in nature. The mounting step requires another double-sided adhesive to bond the rear of the image to the backer.
-
The hanging system
 [3]
[3]Typically, an aluminum composite material (ACM) backing or coloured 3.1-mm (0.12-in.) cast acrylic sheet is used for wall-hung pictures.
The hanging system goes hand-in-hand with the backing. No matter how good the backing is, if the hanging system fails, nothing else matters. A number of systems are available on the market, including cleat-style and patented methods; one must research to find a hanging system that best fits their needs.
The system should be large enough to support the weight of the material. If it is too small, the weight of the picture will exceed the dimension of the hanger, pulling it away from the backer. A cleat-style hanging system requires an adhesive with high shear strength to be used on the front and back of the photo. This will hold the photo in place, whereas, an adhesive with a lower shear will release from the backer over time. This can make the image slide down the backer, or simply separate all together.
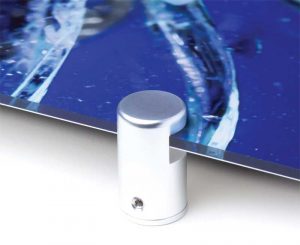
Metal bolts that hold an image to the wall with anchors that have been installed into the wall surface are known as standoff systems. These hanging systems provide sufficient weight distribution and support so that a lower shear strength adhesive can be used for the backer. This is because the standoff goes through the sandwich of the face mount, keeping it together and supporting the entire weight of the piece on all four corners from front to back. With this system, the image does not slide down the backer because its corners are supported equally. What one needs to consider is if they want to carry two different products for this process, and if they want to be able to see the material they are using to mount the backer.
The mounting equipment
 [4]
[4]A number of systems are available on the market, including cleat-style and patented methods; one must research to find a hanging system that best fits their needs.
In addition to the materials outlined above, it is essential to have the correct mounting equipment, which includes: a laminator, a dust removal system (DRS) roller, a cutting mat, and cutting knives. The laminator should have silicon-based rollers with a smooth RA. Similar to the media used for printing, the roughness of a roller determines the print’s finish.
A unit with a heat-assisted top roller can help with face mounting. The larger the diameter of the roller, the less deflection there will be when processing. Less deflection means there will be more direct, even pressure across the piece; if it is uneven, it will cause wrinkling and/or drifting. The durometer rating of the roller must be considered, too. While a higher-rated roller is harder and provides direct pressure, it does not give to any variances in the substrate like a softer durometer would. A softer durometer will flatten out to a wider footprint of pressure, so the downward force will cover a larger surface area.
A DRS roller is used to remove dust and debris from laminator rollers, tables, work surface, prints, and acrylic. Anything that comes in contact with the final work should be cleaned with a roller. This will limit the number of particles that can get into the adhesive and ruin the print. Note: There are two different rollers available—one blue, one red.
The blue one must be used on Epson prints, as the red roller will peel the inks off the paper, which will not come off the roller. This will ruin the roller along with the print. A self-healing cutting mat is always a good choice as it can be used for a long period of time. It should be clean and large enough to work on. Knife blades must be replaced regularly as a dull blade will cause a less than desirable
cut. Some knives have snap-off segmented blades, so one can get several sharp edges from one replaceable blade. With the right kit, one can create results worthy of a fine art gallery.
With almost 10 years of experience with Drytac, Steve Yarbrough currently serves as a product support specialist. With his excellent technical knowledge and thorough understanding of the market, Yarborough provides Drytac’s customers sound advice on both products and applications. His background in art and graphic design also allows him to offer insight into the graphic and print industry. He can be reached via e-mail at steveyarbrough@drytac.com.
- [Image]: https://www.signmedia.ca/wp-content/uploads/2019/06/KG_Venn_18.jpg
- [Image]: https://www.signmedia.ca/wp-content/uploads/2019/06/facemount1.jpg
- [Image]: https://www.signmedia.ca/wp-content/uploads/2019/06/facemount-close-up3.jpg
- [Image]: https://www.signmedia.ca/wp-content/uploads/2019/06/acrylic-facemount.jpg
Source URL: https://www.signmedia.ca/acrylic-face-mounting-how-to-make-a-print-really-stand-out/