All you need to know about banners
by all | 21 January 2014 8:30 am
 [1]
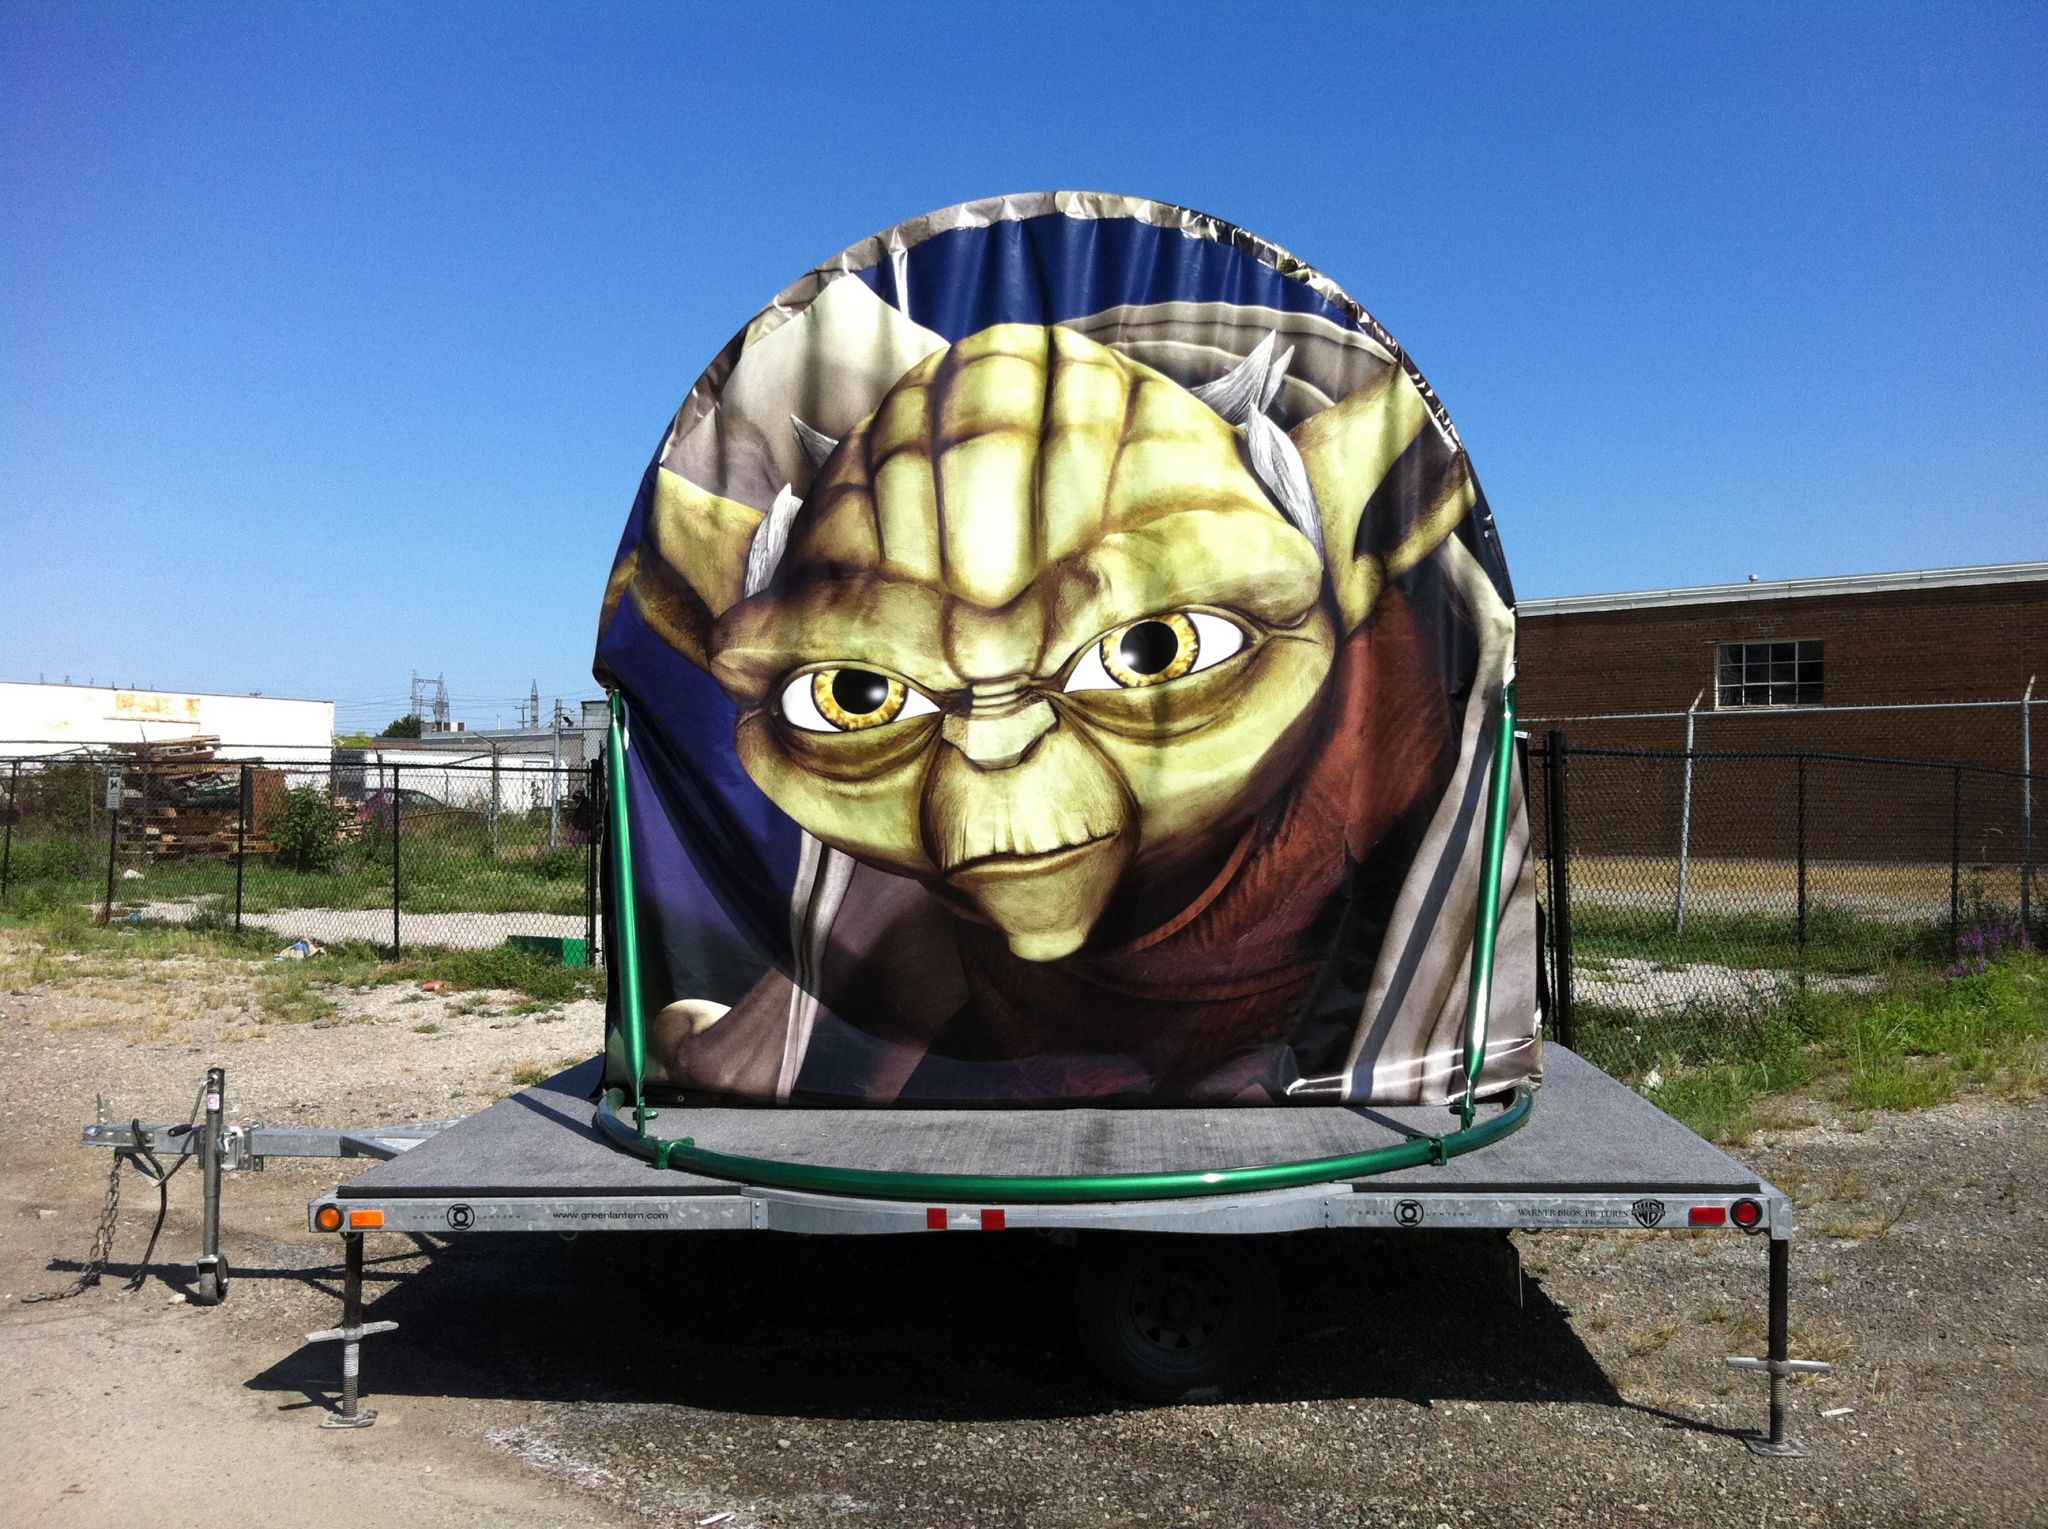
[1]Photos courtesy Shomi!
By Arash Ejtemaee
While many sign shops are branching out into new and unusual markets, industry surveys show the number one wide-format printing application by volume is still banners. Nevertheless, signmakers young and old alike often ask the same questions about this medium, including how to select the right flexible substrates and inks, finishing options for durability and esthetic enhancement, tensioning hardware and installation methods. It is important to stay refreshed and current on banner basics.
With that in mind, the following are some technical tips and techniques based on common concerns for large, small and specialty sign shops.
Layouts
The old phrase ‘time is money’ is especially true in the banner business. Both time and money can be saved by following these simple rules for banner layouts:
- Print all of the trim/cut lines right on the banner. It is easy to drop these lines into the design file all at once and much harder to mark them manually on every single banner on the floor. Note that crop marks are not considered cut lines.
- Also print little marks wherever grommets will be installed.
- Print a faint fold line for pockets.
- When printing multiple banners on the same substrate, do not leave space between them. If two banners can be separated with a single cut instead of two, half the labour is needed.
- Allow a minimum of 25 mm (1 in.) overlap for multi-panel banners; and leave an additional minimum 25 mm of white material beyond the overlap for seaming and/or welding.
Back-to-back banners
The double-sided outdoor banner may be one of the oldest forms of signage, dating back hundreds of years to hand-sewn appliqués and hand-woven silk. By now, though, signmakers ought to be able produce them more efficiently. Doing so begins with laying out the print file.
(Note: the following guidelines are intended for outdoor banners only. For indoor banners, it is better to print on both sides of a single piece of blockout material, for a truly double-sided application.)
It is not unusual, while driving through a city, to look up and see the remains of a double-sided pole banner on a lamppost, flapping in the wind, shredded to pieces, with its bottom arm missing. One may well wonder whose windshield it landed on!
Most, if not all, outdoor double-sided banners end up installed on arms or brackets on a pole or wall. It is important when finishing a pole banner to avoid leaving a single point of failure (SPOF).
To make sure they last beyond the first windstorm, it is best to print them as two single-sided banners and then finish them back-to-back as one. This can be accomplished in the following manner:
- Print on one side of two pieces of material. Compared to printing on two sides of one piece, this is a much easier option, both for printing and for finishing.
- Print the graphics from ‘head to head,’ so the material can be folded in half to create the banner.
- Reinforce the sides of the banner with seatbelt webbing when sewing them together.
- Make sure the seatbelt webbing goes through the pocket and loops back down.
Today’s file layout procedures help make this option possible, while also providing a great yield on banner vinyl, no matter which width of roll is used:
- With a typical example of a customer’s requested double-sided banner (see Figure 1), the dimensions are all inclusive; this means the measurements are taken from the outside edge of the finished material, including the pockets.
- The print file should be designed to make it easy to line up the two sides (see Figure 2). Then, when it is time to finish the banner, it is simply a matter of folding it in half from the top. This means fewer seams, which in turn means fewer weak spots.
- The layout phase also involves nesting banners on the roll for the optimal yield (see Figure 3), with no white space between them. As mentioned earlier, this technique reduces cutting time significantly.
The next process is finishing, including the addition of reinforcement between the layers:
- Fold the banner face to face, such that the printed surfaces are facing each other, i.e. backwards (see Figure 4). Stitch the bottom edge 25 mm (1 in.) up from the cut line; this is equivalent to the bleed that was included in the file for printing. The result will resemble an inside-out printed tube.
- Flip the tube outside-in (see Figure 5), so the graphics end up on the outer surface and the seams on the inner surface, where they will be protected from the sun’s ultraviolet (UV) rays.
- Sew up the sides, stopping shy of the ends, so as to leave an opening for the pocket. Reinforce the sides by inserting seatbelt webbing in between the two layers (see Figure 6), where it will be covered up. Make sure the webbing is looped through the pocket and back down to itself, so the entire pocket is lined.
- Sew the pocket line (see Figure 7) and the job is done.
It is important to note a back-to-back double-sided banner should never be rolled. Doing so will crease the inside layer, resulting in a damaged appearance. Instead, it should only be loosely folded.
Finishing street banners
It often seems like street banners are a mystery, given the dozens of different ‘engineered’ methods—most of which are either too weak or too complicated—to finish banners before they are hung over a street.
Ropes and grommets are not sufficient. The best method is to remove the wind load from the banner material and transfer it to something stronger, such as the aforementioned seatbelt webbing.
This method is quite simple:
- Finish the banner with a webbing-reinforced hem. A 51-mm (2-in.) wide webbing is recommended.
- Attach metal D-rings to the webbing on all four corners of the banner.
- Attach aircraft cable to the D-rings and fasten it to the pole or other mounting structure.
This way, the wind load is taken off the banner, which on a good day could probably withstand about 90 kg (200 lb) of force, and transferred to the webbing, which can take anywhere from 227 to 907 kg (500 to 2,000 lb) before it breaks.
Wind slits
Another common line of questioning concerns cutting wind slits into banners. These are also referred to as ‘wind holes’ or ‘pressure-release valves.’ Signmakers wonder how many they need to add to an outdoor banner to reduce wind resistance—and thus increase the banner’s stability in wind—and where they should be positioned along the material.
The short, sweet and simple answer is, “Don’t do it.” Wind slits are little more than a way to destroy an otherwise perfectly good banner.
Most banner materials are made with an inner scrim of polyester fibre, which adds most of the strength to the white outer polyvinyl chloride (PVC) film that gets printed. The moment a cut is made through the banner, the material is immediately weakened. The reduction in wind resistance is minimal, but the damage is extensive. And some testing has shown wind slits actually increase drag on a banner.
Engineers have found the reduction of wind resistance achieved by cutting slits into the average banner is approximately three per cent. Better to simply reduce the banner’s size by three per cent and get the same result, avoiding the potential issues of cutting into the material.
Barricade banners
In the summer, many banners are installed on barricades at street fairs and other events. These are easy to make and a great way to dress up an outdoor area, but not everyone lays them out and prints them in both a cost-effective and attractive manner.
There are three general schools of thought on how to execute barricade banners:
- Make a single-sided rectangular banner (see Figure 8). This is the cheapest option, but also the least attractive.
- Make a larger rectangular banner that drapes over the top of the barricade, with images printed from ‘head to head’ on both sides (see Figure 9). This is better, but not great.
- Measure the barricade before printing two images head to head and finishing the top edge with a fitted curve (see Figure 10). This is the most presentable design. The file should be laid out with a couple of inches of bleed on either side. Finishing options include (a) grommets on the bottom corners for zip ties and/or (b) hook-and-loop (i.e. Velcro) straps below the top clasp and at the bottom edge.
Mitred pockets
In the past, large banners and billboards were installed on walls using flat bars, which were inserted into the material’s pockets and then fastened into drill holes in the wall. This was accomplished with a mitered pocket design, which allowed all four pockets to have open ends.
Today, the flat bar installation method is a thing of the past, but mitred pockets are still used. These are a better option whenever pockets are required on all four sides of a banner and open at both ends, so a bar or tube can be slid in from either end after the finishing stage, stretching the graphic over a frame of some sort.
The following are the steps needed to create a mitred pocket:
- Mark and cut the corners (see Figure 11).
- Fold the edges over (see Figure 12).
- Weld or sew the pocket, leaving the ends open (see Figure 13).
Hemming 101
Hemming is the act of folding over the edge of a material. There are several reasons to do so with a banner:
- To reinforce the edge of the banner, as folding creates a double layer, which is stronger than a single layer.
- To give the grommet something to hold. (Grommets are brass or silver rings that are punched through and pressed into the centre of the hem to allow a fastener, bungee cord, rope or wire tie to pass through the edge of the banner.)
- To keep the edge of the banner from curling in and out, particularly for suspended banners.
- To prevent the edge of a fabric banner from fraying or unravelling.
- To give the edge of a banner a more finished look.
There are also a few ways to make sure the hem remains folded during the useful life of the banner:
- Taping, using double-sided banner tape. This is the least expensive and least durable option.
- Sewing with a single or double stitch. This is the most common method for banner finishing. It looks good, lasts longer and does not cost much.
- Welding or heat sealing. This only works with certain materials, including banner PVC. The results look great, but this process usually carries the highest expense.


To sew or not to sew?
Any indoor banners can be sewn, as they should prove durable no matter what kind of thread is used, given the lack of the sun’s UV rays, which can otherwise lead to thread breakdown.
Hems should be sewn, although for large outdoor banners, they should also be reinforced with seatbelt webbing. Back-to-back pole banners with sewn pockets should have webbing on the sides only.
A special sewing machine called a serger is recommended when sewing stretch fabrics, so the seams will stretch with the fabric. It is also known as an overlocking sewing machine.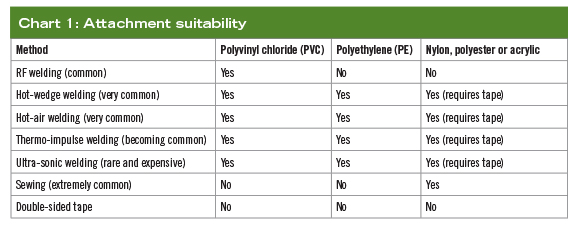 [2]
[2]
With outdoor banners, it is important to be more careful about sewing options. A cotton or clear thread will not last more than a month. Multiple panels should never be sewn together to create one large banner; they should always be welded instead.
Sewing is reasonably inexpensive, fast and strong. Welding is stronger, but slower and more expensive. Tape requires no tools, but can be finicky and is only suitable for smaller banners.
To Weld or not to weld?
As suggested, when assembling a banner that has been printed on more than one panel, welding is a must. In this context, the process is referred to as banner seaming, banner joining or multi-panel banner finishing.
There are several different technologies available for welding banner material. Each has its pros and cons, depending on the specific material being printed (see Chart 1).
To reinforce or not to reinforce?
There are only a handful of banner finishes that can actually be reinforced—and not all of them really should. These scenarios include reinforced hem, pocket, grommet and corners.
Arash Ejtemaee is president and chief banner problem solver for Shomi! in Mississauga, Ont., which sells banner hardware and finishing services exclusively to resellers in the sign, marketing and visual graphics industries. This article is based on a series of pieces he wrote for the Shomi! website and on a ‘banner school’ seminar he presented at the Sign Association of Canada’s (SAC’s) 2013 CONSAC trade show and conference. For more information, visit www.shomi.ca[3].
- [Image]: http://www.signmedia.ca/wp-content/uploads/2014/01/Yoda_Gyroscope.jpg
- [Image]: http://www.signmedia.ca/wp-content/uploads/2014/01/SM_Banners_Chart1.jpg
- www.shomi.ca: http://www.shomi.ca
Source URL: https://www.signmedia.ca/all-you-need-to-know-about-banners/