
Characteristics of ceramic inks
The ceramic inks used in digital printing are similar in nature to the frit used in screenprinting. They behave and perform almost identically. The main difference is the inks are produced using smaller particles, allowing them to flow through the printhead onto the substrate, and they contain inorganic pigments that help keep them colour-stable over the lifetime of the printed image. Also, ceramic inks used in North America are free of heavy metals like cadmium or lead.
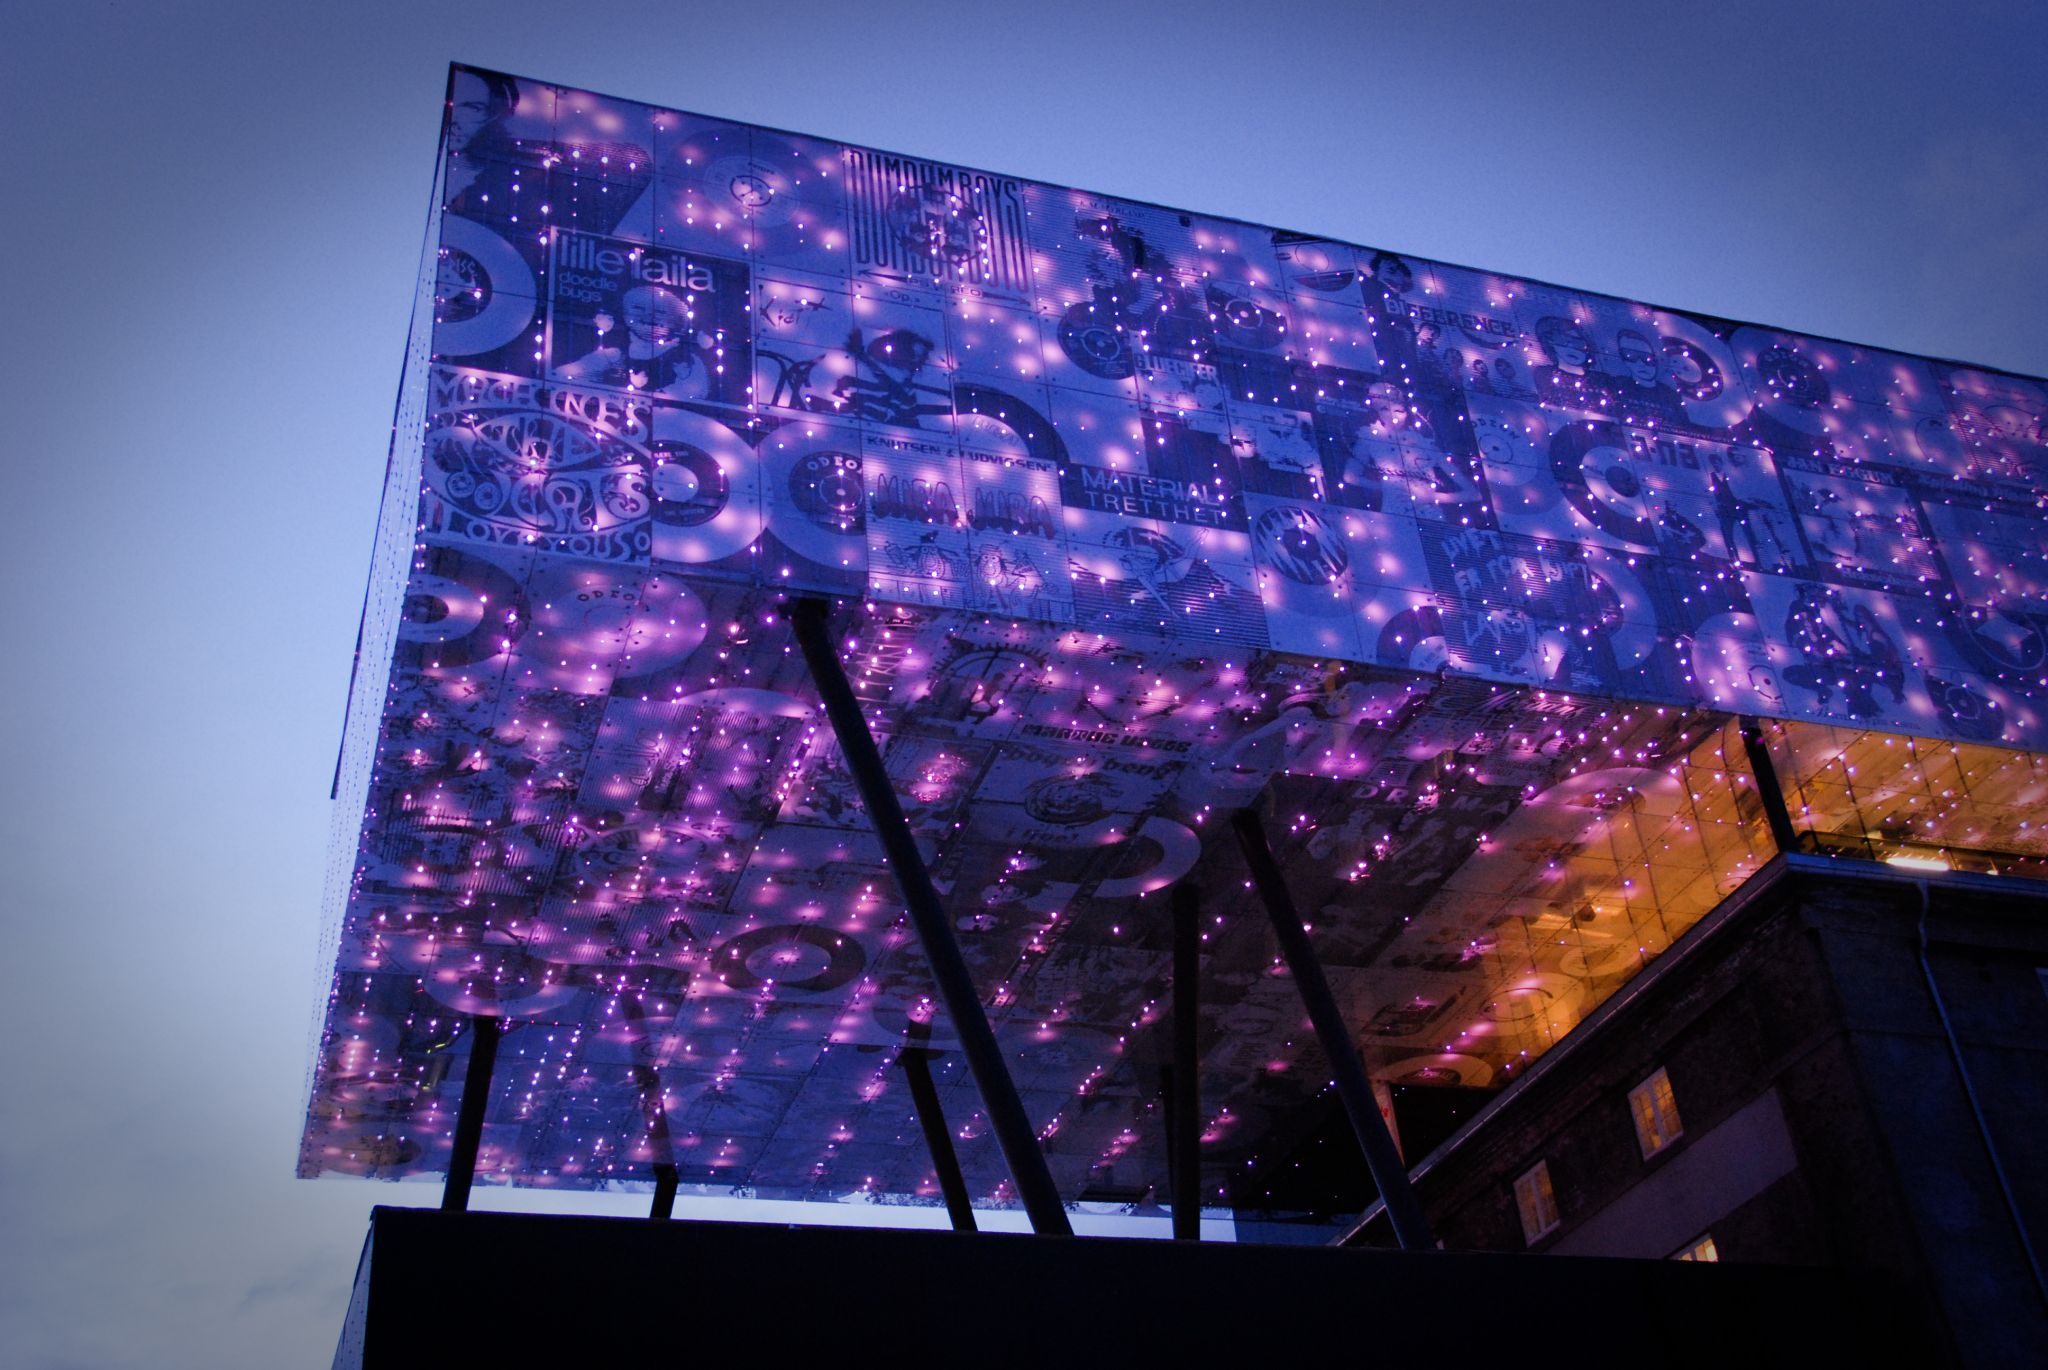
Each image digitally printed onto the glass façade of Norway’s Rockheim Museum is unique, so screenprinting would have been cost-prohibitive.
A wide colour gamut can be achieved by mixing base inks through either of two methods: premixing or ‘digital mixing’ during printing. Premixing is useful when only a few colours are involved or when a particularly smooth appearance is required for interior signage.
With digital mixing, on the other hand, distinct variations in colours are achieved by placing drops of different inks next to each other. The concept is similar to a TV screen, which uses red, green and blue (RGB) pixels that appear separate from another when viewed up close, but form other colours and full images when viewed from farther away.
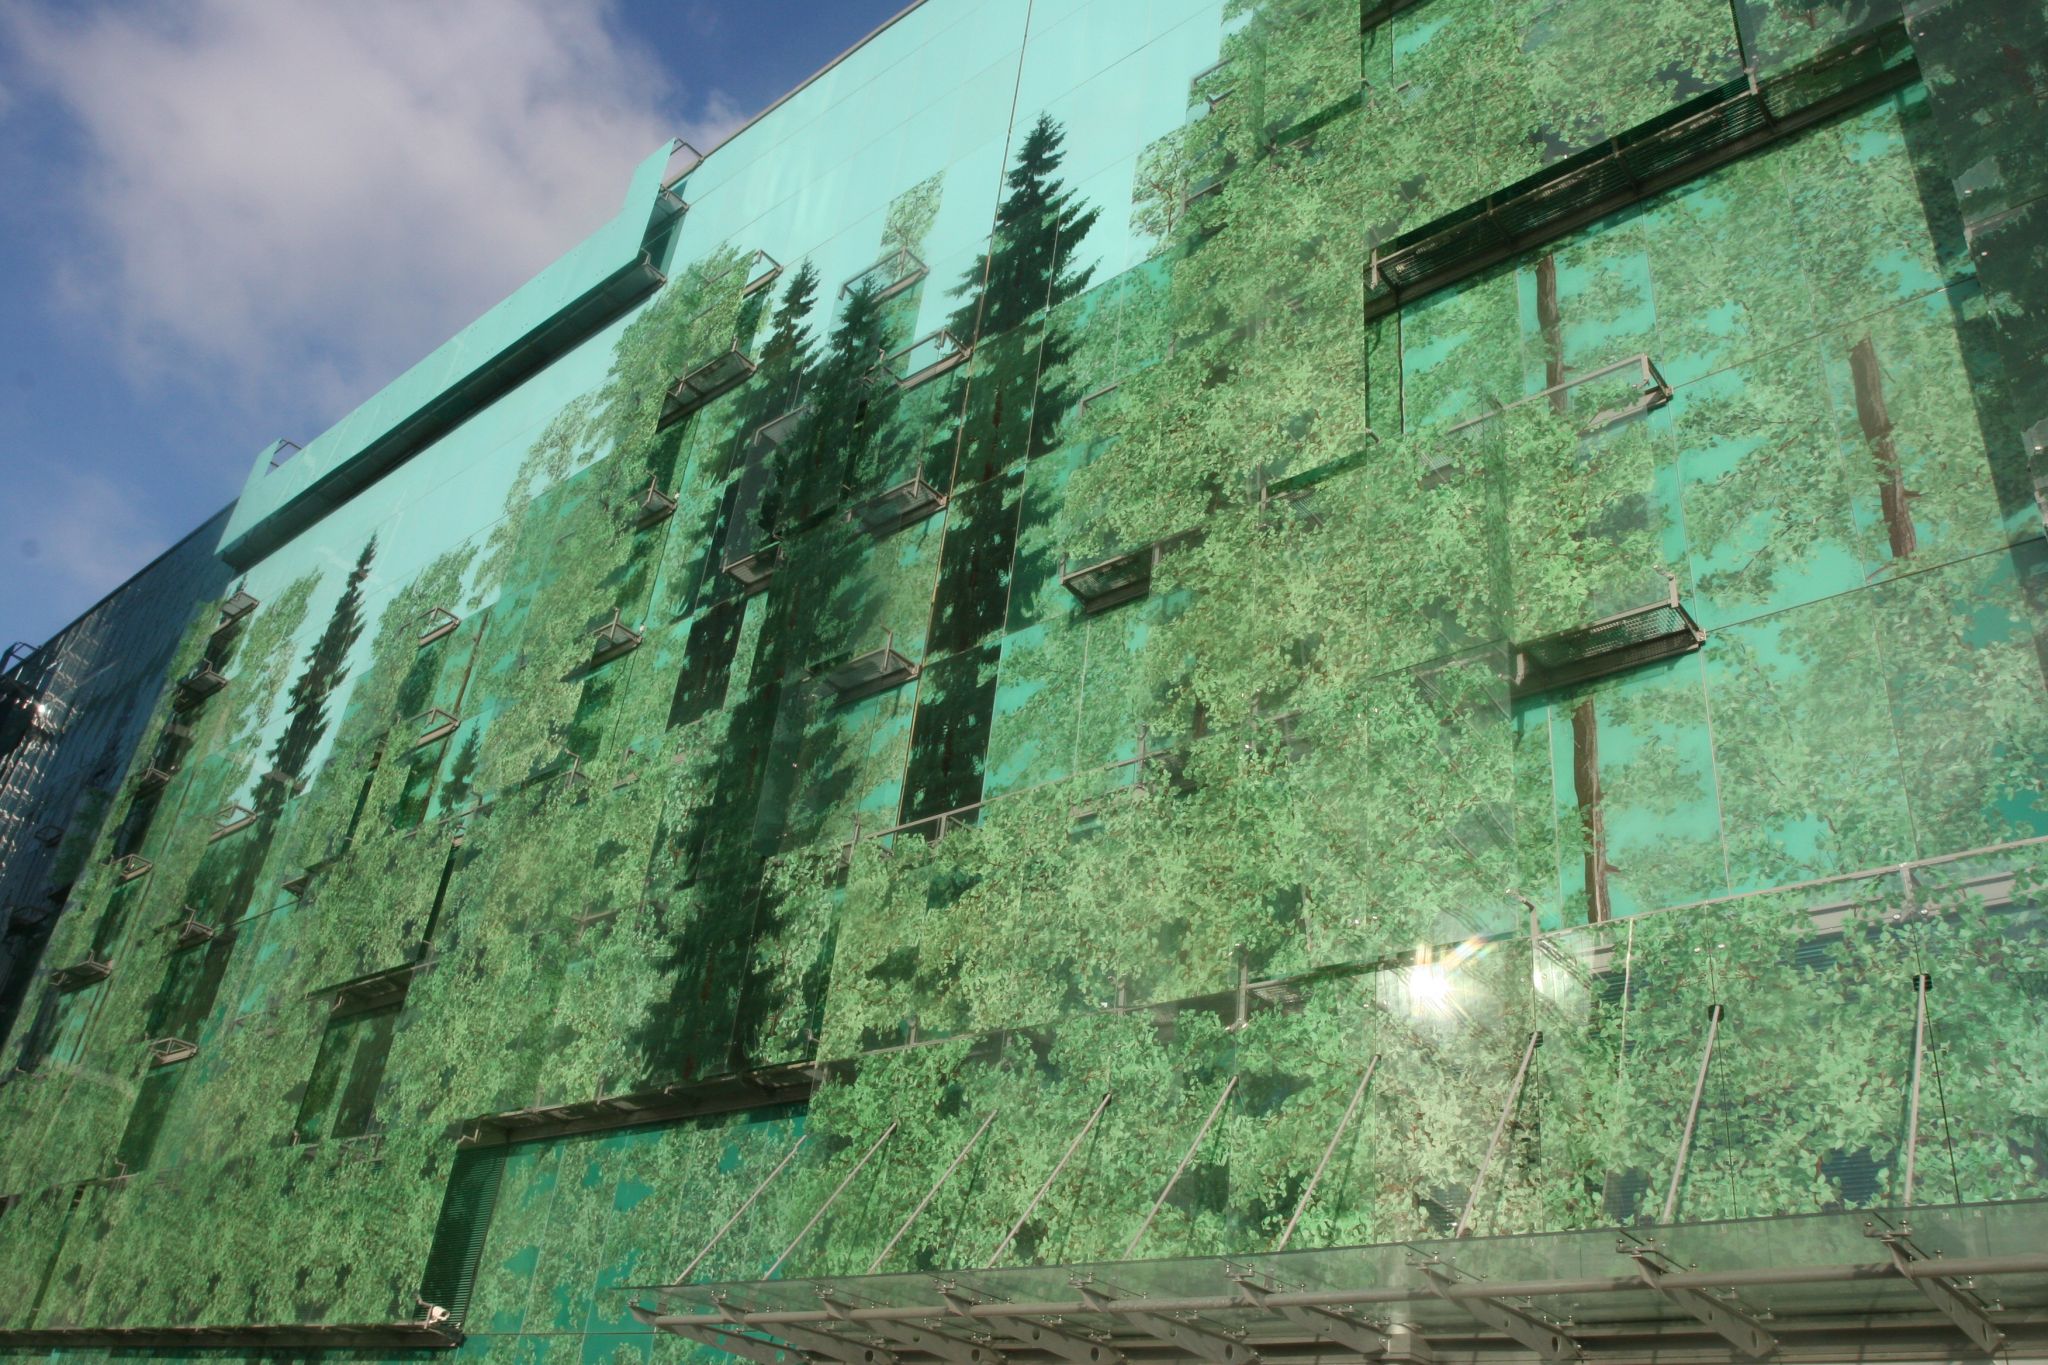
Inks can be applied in various quantities and thicknesses to achieve various results. Blue ink, for example, tends to be more translucent than other colours, so a blue-heavy graphic may allow greater light transmission into a building’s interior during the day and out to the exterior during the night. A façade can take on a stained-glass effect.
The printing process
The digital printing process begins, of course, with the production and manipulation of electronic design files. Both raster- and vector-based images can be used for ceramic frit inkjet printing, depending on the project’s requirements.
Compared to screenprinting, digital ceramic inks have low viscosity. This enables higher-resolution graphics to be achieved. At thicker opacities, care must be taken not to blur the printed image.
The image files may be designed individually for each pane of glass or an entire façade may be designed as a single large file and then ‘tiled’ across multiple panes. Software for this purpose is usually printer-specific and can also handle adjustments to allow for mullions and holes in point-supported glass, to ensure an image appears seamless from one pane to the next.
Raster image processor (RIP) software turns the image into multiple layer files for each of the base ink colours. A purple graphic, for example, is processed into blue and red layers. There may also be multiple levels of the same colour.
Once these colour layer files are sent to the printer, the image is interpreted and ceramic inks are deposited onto the glass substrate. Generally, the printed glass is then sent through a tack oven to dry the inks, but some newer-generation presses are able to dry the inks as the image is being printed.
At this point in the process, although the inks are dried, they carry a matte finish and have not yet been permanently adhered to the glass substrate. For that step, the printed glass must go through a separate heat-treating oven.
The exterior of AFIMall City in Moscow, Russia, is exemplary of how enormous graphics can be integrated into architecture.
The glass is heat-treated, tempered or even bent to specifications. The oven fires at temperatures of 600 to 670 C (1,112 to 1,238 F), depending on its setup, which permanently affixes the image to the glass, with a glossy finish.
From here, the printed glass can be directed to other processes in the production line, including coating application, laminating and insulating. If it is to be used in an interior application, however, it might instead be left in its current form.


