Before initiating any automated cleaning, print service providers (PSPs) should perform a manual maintenance routine.
3. Perform a manual maintenance cleaning process
Before initiating any automated cleaning, PSPs should perform a manual maintenance routine. Depending on the device, one may need to consult the printer’s operations manual, or simply follow the steps provided in a self-guided user menu. In any case, the process will require operators to access potentially fragile components, so it is critical they take their time and follow each step carefully.
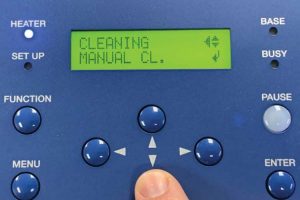
1) Press the function button on the menu system.
2) Use the directional arrows to locate the manual cleaning command.
3) Press the enter button to activate the process.
Instructions will be automatically displayed on the front panel screen. Follow the steps to manually clean the device.
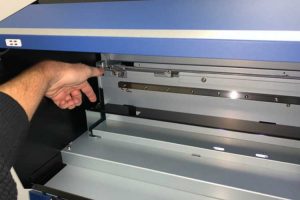
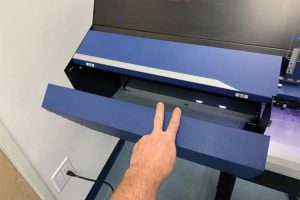
i) When prompted, open the left service door by pulling downward.
ii) Remove the metal flange in the service bay by taking out the single thumb screw at the far-left top edge and pulling the flange toward the front of the printer.
iii) Gently pull the printhead from the right side of the bay into the service area by dragging it to the left until the lower light-emitting diode (LED) lights are shining up at all the printheads.
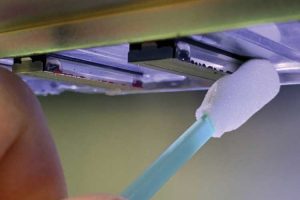
iv) Dip a foam-tipped swab into the cleaning solution that came with the device.
v) Gently wipe around each printhead with the swab until all the deposits of ink and debris disappear, leaving a shiny metal surface.

Remove the metal flange in the service bay by taking out the single thumb screw at the far-left top edge and pulling the flange toward the front of the printer.
vi) If any other dust or contaminants are visible on any part of the printhead, gently wipe it down with a clean, dry foam-tipped swab.
vii) Push the printhead back out of the service bay to the right. Then replace the metal flange by aligning all three metal tabs into their respective slots, followed by a gentle push to the right-hand side of the machine. Next, align and replace the thumb screw. Then press the left service door upward until it reaches its magnet closure.
viii) Now open the service door on the right by pulling it downward.
ix) Dip another foam-tipped swab in the cleaning solution and gently wipe the black rubber O-rings that cap each printhead.
x) Check the wiper for any residue and gently clean it with the swab.

Note that substantial amounts of dried ink have collected around each printhead. If this is not cleaned, the ink will prevent proper printhead capping.
xi) Inspect the service bay, and remove any other debris with a clean cloth or another dry foam-tipped swab.
xii) Close the right-side service door by pulling upward until it reaches its magnetic closure.
The automated cleaning system will now perform a regular cleaning.


