Lamination and mounting strategies
by all | 11 February 2014 2:49 pm
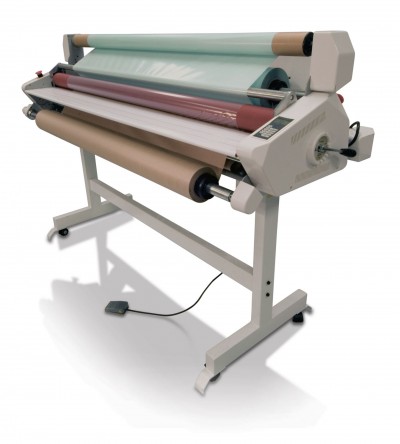 [1]
[1]Photos courtesy GBC Canada
By David Ferguson
In recent years, there has been an explosion of wide-format printing across the sign industry, the print-for-pay sector and even corporate offices. Once a graphic has been printed, however, there are many options for laminating or mounting it to turn it into a finished product, which should be part of any print service provider’s (PSP’s) marketing efforts.
With the right strategy for finishing graphics, sign shops can add further value to their printed output, differentiate their services from others’ to help get themselves noticed in the busy marketplace and increase their revenues and profits.
Mounting and lamination can yield many opportunities to sell new products to existing customers, adding extra ‘pop’ and ‘sizzle’ to a sign shop’s offerings. It is not only the larger shops that are profiting from these finishing processes. A lot of small shops do well with mounting and laminating, too.
Lamination
Thermal lamination, which applies a heat-activated film to printed media, is the most common form of lamination and has been used for more than 50 years. Most schools, for example, have a tabletop thermal laminator. The same process is used for large-format graphics, just using a wider film. It is suitable for everything from maps and menus to trade show graphics and indoor signage.
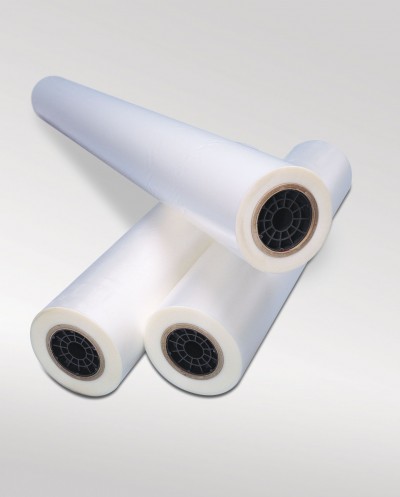 [2]
[2]For thermal lamination, the roll material is usually polyester-based.
Thermal lamination is also the least expensive way to laminate printed media. The laminating material is usually polyester and, because it is heat-activated, there is no need for a silicon release liner. Thermal laminates vary in thickness from 0.04 to 0.25 mm (1.7 to 10 mil) and will add rigidity to a print.
Cold lamination is a great entry-level option for print shops because the equipment is less expensive, but the supplies—including plastic films coated with adhesives and glossy backings—are more expensive. It has also been popular in the wide-format inkjet printing sector, as some inks and papers could be damaged by heat. There are also heat-assist laminators available, which work like a cold laminator, but add just enough heat along the top roller to enhance the appearance of cold laminates.
In the sign industry, lamination—either hot or cold—is generally used to create a decal of one form or another. This process involves applying an adhesive to the back of the printed media and, at the same time, an overlaminate on to the front. This process can be used for mouse pads, applying premask to cut vinyl, trade show displays, window and floor graphics, write-and-erase boards and indoor and outdoor signage.
Lamination makes printed materials better in three ways: protection, preservation and enhancement.
Protection
There are many ways in which lamination can protect printed materials. The most common is encapsulation, which involves the double-sided lamination of a print with at least 6.4 mm (0.25 in.) of ‘lip’ all around the edges. Once encapsulated, even a simple paper document can be immersed underwater without damaging the print on it.
Report covers, book covers and menus that are handled a lot indoors might only be finished with single-sided lamination, whereas encapsulation is commonly used to protect maps and other documents that need to be used outdoors in inclement weather conditions.
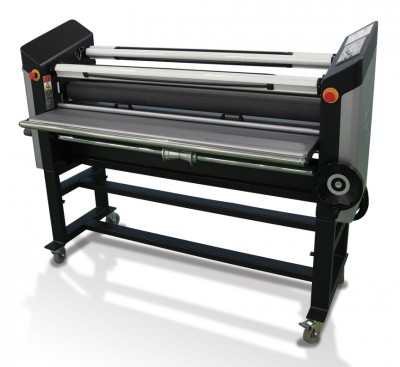 [3]
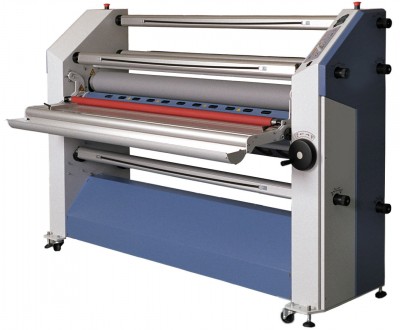
[3]Cold laminators are less expensive, making them a better entry-level option for many print shops.
As for sunnier weather, a lot of laminates offer protection against the sun’s harmful ultraviolet (UV) rays. While any outdoor graphic can fade over time, a laminate with UV inhibitors will prolong the life of the graphic. At the very least, the graphic will be protected for the duration of a given promotion or event.
It is common for large-scale urban construction sites to be surrounded by decorated hoardings. These temporary walls often feature printed graphics promoting the office building, condominium or other structure being built. In high-traffic areas, however, signs and graphics are susceptible to graffiti, so the real estate developers may be keen on protecting their hoardings with an anti-graffiti overlaminate. Once this has been applied, any sprayed paint, lipstick or even permanent marker ink can simply be wiped off the surface without damaging the graphics.
Preservation
Preserving a print involves adding longevity, i.e. prolonging the life of the document or graphic, whether for a month or for 30 years. There are many ways to accomplish this effect using lamination.
Priceless artifacts and old newspapers, for example, are often laminated to prevent them from yellowing due to oxidation and to protect them against humidity and moisture.
There are also many mounting methods for preservation purposes.
 [4]Enhancement
Lamination also adds value the client can see for him/herself, creating a more professional-looking graphic that will ‘jump off the page’ and be noticed.
Glossy overlamination, for example, makes inkjet-printed colours appear more vibrant. Matte lamination, on the other hand, can make graphics easier to read, particularly in areas with glare, and provides a subtle tactile effect that adds to passersby’s perception of quality.
A thicker laminate can even add dimension to an image. Some of these offer a textured finish, such as sand, canvas or linen. Textured satin is a popular choice for trade show graphics, not only for its pebble finish, but also because it is scuff-resistant, adding to the protection of a graphic that must be handled frequently.
Mounting
A laminator can also be used to mount decals to substrates. The rollers ensure no bubbles are left in the media.
Prints may be mounted onto card stock, foam-core materials, rigid styrene- core display boards, polyvinyl chloride (PVC) boards, plywood, polymethyl methacrylate (PMMA) or aluminum, just to name a few options.
Documents are often mounted to a substrate to help preserve them. By hanging a document on a wall, for example, it is preserved simply by getting it out of harm’s way.
Many archival papers used with today’s inkjet printers are rated to last for more than 100 years. Once printed, they are mounted to an acid-free foam-core substrate, using a pH-neutral mounting adhesive, and framed. It is important to use both materials and processes that will not cause the print to suffer any degradation.
Another technique popular with many photographers and art galleries is to mount prints onto an aluminum composite material (ACM) with archival properties. This is a lightweight alternative to aluminum panels.
Adding value
Finishing graphics through lamination and mounting increases their value. A typical 0.6 x 0.9-m (2 x 3-ft) inkjet-printed poster, for example, may sell for anywhere from $24 to $48, depending on the specific market. Once it is gloss-laminated and mounted to a foam-core substrate, however, it will sell for anywhere from $60 to $90.
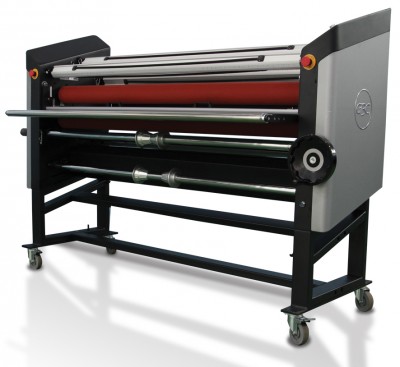
 [5]
[5]Some laminator models are available in both dual-heat and single-heat versions.
Another way lamination and mounting can add value is by enabling new applications.
Window graphics
Retail windows are often underused when it comes to marketing. The upper 20 per cent of a window’s area, especially, is the best place to display window graphics, as it is generally not used at all but provides ideal sightlines. As more retailers recognize this opportunity, there is a growing trend for temporary window graphics.
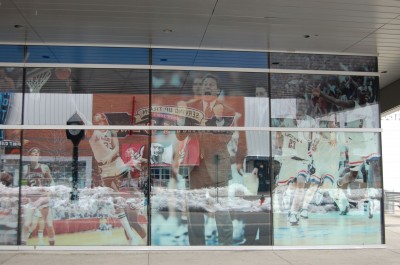
It has also become simple for PSPs to produce window graphics by laminating the print with an optically clear, low-tack, two-sided, cold-applied adhesive. One side of the adhesive is permanent, which is applied to the graphics, and the other is temporary, which is applied to the window pane.
As the adhesive is clear, it does not affect the appearance of the printed graphics as light shines through the window. There is no need for a specialist to install the graphics; they can be applied to the window using a piece of rigid plastic, even just a credit card, and if they are crooked, they can be removed and re-applied. And when the promotion is over, the graphics can be removed without having to scrape away the adhesive from the glass.
Roll-up banner stands
Roll-up banner stands are popular because they are easy to set up and move around. It is common today to see them not only at trade shows, but also in mainstream retail environments, like Home Depot and Lowe’s, and in front lobbies.
The hardware has become very affordable, making these applications accessible for any print shop. The key is to print the graphics on a suitable material, like poly-banner or vinyl, laminate them and then assemble the stand.
Face-mounted graphics
In high-end retail stores and art galleries, it is becoming common to see graphics face-mounted onto PMMA, a transparent polycarbonate.
Finishing these graphics involves applying an optically clear adhesive to the printed side of the graphic, rather than the back, and then applying the printed side to the PMMA. This way, the graphics are actually viewed through the polycarbonate, which protects them.
Similar techniques can be used to apply signage to lightboxes’ glass surfaces, for backlit applications.
 [6]
[6]Temporary window graphics can be produced by laminating a two-sided adhesive to a printed graphic. Photo courtesy Flexcon
Floor graphics
In the past, floor graphics for stores and other environments had to be supplied by specialized screenprinting companies, but today, anyone with inkjet printing technology can produce them. The key is to prevent people from slipping or sliding as they walk on the graphics. Thus, the prints must be laminated with a safety-certified slip-resistant coating. These are rated to ensure the floor will be no more slippery than it was before the graphic was applied.
A long-term investment
While inkjet printing technology changes year after year, achieving better quality and faster throughput, laminators have not changed as much. The average lifespan of a wide-format inkjet printer is about three years. A laminator will outlast that by many years.
If a shop is new to lamination and mounting, it is important to start by practising with a few small pieces before working up to larger sizes. Once a handful of processes are learned well, however, the shop will easily be able to add 30 or more applications to its product line.
David Ferguson is a large-format graphics specialist for GBC Canada, which sells laminators, adhesives and laminates, and the former co-owner of a large-format print shop. This article is based on a seminar he presented at the 2013 Graphics Canada trade show. For more information, contact him via e-mail at david.ferguson@gbc.com[7].
- [Image]: http://www.signmedia.ca/wp-content/uploads/2014/02/2right.jpg
- [Image]: http://www.signmedia.ca/wp-content/uploads/2014/02/3000002_3_4_NAPLAM-SB.jpg
- [Image]: http://www.signmedia.ca/wp-content/uploads/2014/02/1737173_Spire_I_54C_64C-copy.jpg
- [Image]: http://www.signmedia.ca/wp-content/uploads/2014/02/64Ct-copy.jpg
- [Image]: http://www.signmedia.ca/wp-content/uploads/2014/02/62_pro-2.jpg
- [Image]: http://www.signmedia.ca/wp-content/uploads/2014/02/College-Basketball-Experience-4.jpg
- david.ferguson@gbc.com: mailto:%20david.ferguson@gbc.com
Source URL: https://www.signmedia.ca/lamination-and-mounting-strategies/