Mastering adhesive vinyl applications
by carly_mchugh | 19 October 2022 10:49 am
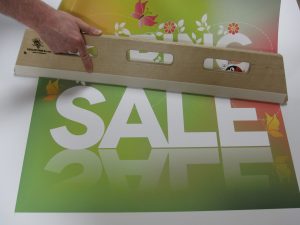 [1]
[1]Every type of vinyl has a different feel when installing it, with slightly different performance characteristics. Photos courtesy General Formulations
By Jay Kroll
I remember the mess laying out on the table in front of me. Bits and pieces carefully scattered and a how-to guide pulled up on my computer. I worked my way through the laborious step-by-step instructions on how to replace the screen of the iPad my youngest child had accidentally damaged in a tug-of-war match with her brother. Tiny screws were lined up in order, along with a selection of miniature tools needed to complete the work. However, something was wrong. I followed the directions to the letter, carefully managed my workspace to prevent any contamination, and even had the one oddball screwdriver to get the last screw behind the battery. Yet, somehow, the new part would not fit. It was close, but the cable was in the wrong place, and a few screw holes did not quite line up. I had done everything right on my prep and process, but the part I bought was meant for a different model. Did I mention the correct one was a few dollars less, and I could have gotten it two days quicker? After the hassle of the return and reorder, and a few more days of delay, I finally got the iPad working again. Sometimes you have to learn things the hard way, and the reminder can be painful and humbling.
A few years ago, early in my career with General Formulations, I got a chance to put up a large wall mural, printed on peel-and-stick vinyl. My co-installer thought I should try and figure it out myself, and being the hands-on problem-solver I am, I accepted the challenge. I had been working with adhesives for close to 20 years, but this was my first attempt at installing a decal larger than a poster. This time, I was working on a 2.4- x 3.6-m (8- x 12-ft) wall. The project taught me a lot about layout, alignment, surface prep, tools, and technique, and I have worked to improve those elements in the years since.
I am willing to bet there are pros who have had similar experiences, along with some memorable installs which made much out of little or involved pulling a proverbial rabbit out of a hat. They might have even had a few failures which taught painful lessons that still stick with them today.
In my iPad repair situation, I had the right tools, but the wrong material. My wall mural had the right material, but a remarkable lack of application knowledge. These two vital components go hand-in-hand to make sure a job is done right, avoid rework, and drive repeat business.
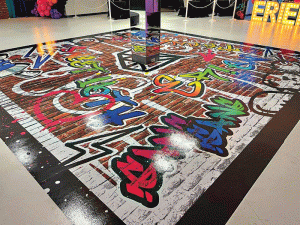 [2]
[2]For vinyl floor graphics, it is important to understand the surfaces they will be installed on, how long they are going to be down, and what kind of traffic they will see.
Make good choices
Everyone is looking for a simple, one-size-fits-all solution which will stick to everything, stay up indefinitely, and come down cleanly when the time is right—regardless of the surface it is sticking to, or how long it has been up. The best I have seen is a one-size-fits-most, which still involves a lot of luck and careful material selection.
There is much that can be done with material selection on the front end, before ink hits vinyl, to ensure a job well done. The best way to foster those good choices is to ask good questions. It is important to understand some of the basic elements of the intended surface you are sticking to, as well as how you want the adhesives to perform.
Two key factors to consider from the outset are not all adhesives are equal, and “removable” is not a universal term. Just as there are different paints for different surfaces—matching the level of bond, durability, and performance of the project—the same is true of adhesive vinyl.
Using a low-tack removable window film on high-gloss painted walls might work, but the performance is not guaranteed, and there are engineered solutions which might be more suitable.
The key with vinyl graphics is to match the material with the application.
A quick look at the building blocks of adhesive vinyl products will help develop an understanding of which product is best suited for which project. Stickers and decals have three basic components: film, adhesive, and liner. The film is normally polyvinyl chloride (PVC) and is available either calendered or cast, with monomeric or polymeric film. “Cast” and “calendered” reference the manufacturing method, while “monomeric” and “polymeric” reference the ingredients.
Most everyday, three- to five-year outdoor films are in the polymeric calendered category. Wall films, floor graphics, and other specialty materials also fit in this category. High-performance, high-cost, long-term options are in the polymeric cast vinyl category, and short-term, economic options are in the monomeric calendered category.
Adhesives have a wide range of options, with key terms like “permanent” and “removable,” “solvent” and “water-based,” “high-tack” and “low-tack,” and “opaque” and “clear.” The intended applications for these different chemistries are typically mentioned on the manufacturer’s data sheets, and it is highly recommended to consult these documents to help build material knowledge. A good distributor partner or manufacturer’s representative will also be a helpful resource when processing the information for different applications.
 [3]
[3]Just as there are different paints for different surfaces, the same is true of adhesive vinyl.
The liner is a key piece of vinyl construction, serving as the delivery layer for the finished product and sometimes adding the valuable functionality of air egress for dry-applied, bubble-free graphics.
Practice makes perfect
Truth be told, it is a long way from the lab to the jobsite, and repeated, regular, hands-on experience is the critical piece in the process. Anyone can pick up a guitar and learn a few chords, but it takes years of dedication and practice to play like Eric Clapton. I may know a lot about cross-linkers and peel tests, but I have not seen half of what other pros have in actual installs. The parts I know are the constants which are true with any good vinyl installation. However, there can be a lot more to the process, including a site audit and prep work.
A friend of mine who is a veteran installer has a prep checklist which starts at the initial site visit, taking notes and photos to attempt to head off any complications before they come up. For wall murals, he will take note of the fixtures to be removed or avoided. He will also inquire on the paint used, whether the wall has a separate primer layer, and how long it has been on the wall to make sure it is fully cured. For floor graphics, it is important to understand the surfaces they will be installed on, how long they are going to be down, and what kind of traffic they will see.
Often, the initial site audit will lead to an extra indemnification line in the job contract. My installer friend once told me about a project which involved a trailer wrap over old paint with partial graphics. The customer wanted to be able to remove the wrap cleanly after two years. However, they would not approve repainting the surface prior to install, so my friend needed to add a clause to the contract stating clean removal would not be guaranteed. It is important to point out any potential problems ahead of time, but if the customer is unable or unwilling to set the job up for success, installers need to protect their brand and their business.
 [4]
[4]When preparing to install a mural, it helps to take note of the fixtures to be removed or avoided, as well as whether the paint/primer is fully cured.
While sometimes tedious, prep work is the most important step. When I painted houses back in college, it seemed like 75 per cent of the job was scraping paint, pressure washing, masking windows, and organizing materials—all to get some paint up. This type of work was not seen or noticed in the finished product, but the groundwork ahead of time was what made the actual painting go faster and look better in the end. Every surface is different, but it should generally be free of dirt, debris, grease, or any other sort of contamination which could lead to adhesion issues for the decal. The best tools to use are wire brushes, microfibre cloths, degreasers, and scrapers, plus a healthy amount of isopropyl alcohol or similar solution for the final cleaning step.
For the install, the surface, size, and material are going to determine the proper technique. Do you use the hinge method or just peel the whole liner? Do you start from top to bottom, or left to right? Do you premask or tape it in place. Do you like to use magnets or teamwork? Felt squeegees or foam rollers? Heat or no heat? Every job and every installer will do this part a little differently, which is OK. However, it is important to know your materials. Every type of vinyl has a different feel when installing it, with slightly different performance characteristics. Eventually, you will pick your favorites and grow your experience as the jobs and years go by.
Conclusion
The developments in films, adhesives, and ink technology, combined with the increasing prevalence of temporary and customized graphics in commercial and residential settings, point to an incredible opportunity for growth in the sign and decal segment in the coming years. Couple this with the ingenuity of installers who are pushing the limits of those technologies and forcing the development of new and different solutions to meet those evolving needs, and you have an exciting outlook on the future of vinyl applications. Print service providers who are aware of the options and can both educate and reliably deliver a quality product will lead this field. My advice for them is to continue to learn, grow, blaze trails, and try new things. Staying curious and creative is a key component in this industry.
Jay Kroll is a product manager at General Formulations, a leading manufacturer of pressure-sensitive solutions for the graphics industry. His focus is on cut vinyl, transit, and wall graphic applications. Kroll has been designing and developing various manufactured solutions for more than 20 years in the medical, aerospace, specialty tape, and graphics industries.
- [Image]: https://www.signmedia.ca/wp-content/uploads/2022/12/6-mil-Gloss.jpg
- [Image]: https://www.signmedia.ca/wp-content/uploads/2022/12/Installed-by-317-Print_GF-210-209-Traffic-Graffic.gif
- [Image]: https://www.signmedia.ca/wp-content/uploads/2022/12/DSC_3221.gif
- [Image]: https://www.signmedia.ca/wp-content/uploads/2022/12/Wrapped-by-Wrapseshaz-with-GF-262HTR-WallMark-Sand-1.gif
Source URL: https://www.signmedia.ca/mastering-adhesive-vinyl-applications/