
Preparing the paint gun
To ensure the newly mixed paint can be sprayed properly onto the substrate, the next step is to make sure the paint gun is ready. There are two types of spray guns in today’s market: conventional and high-volume, low-pressure (HVLP) models.
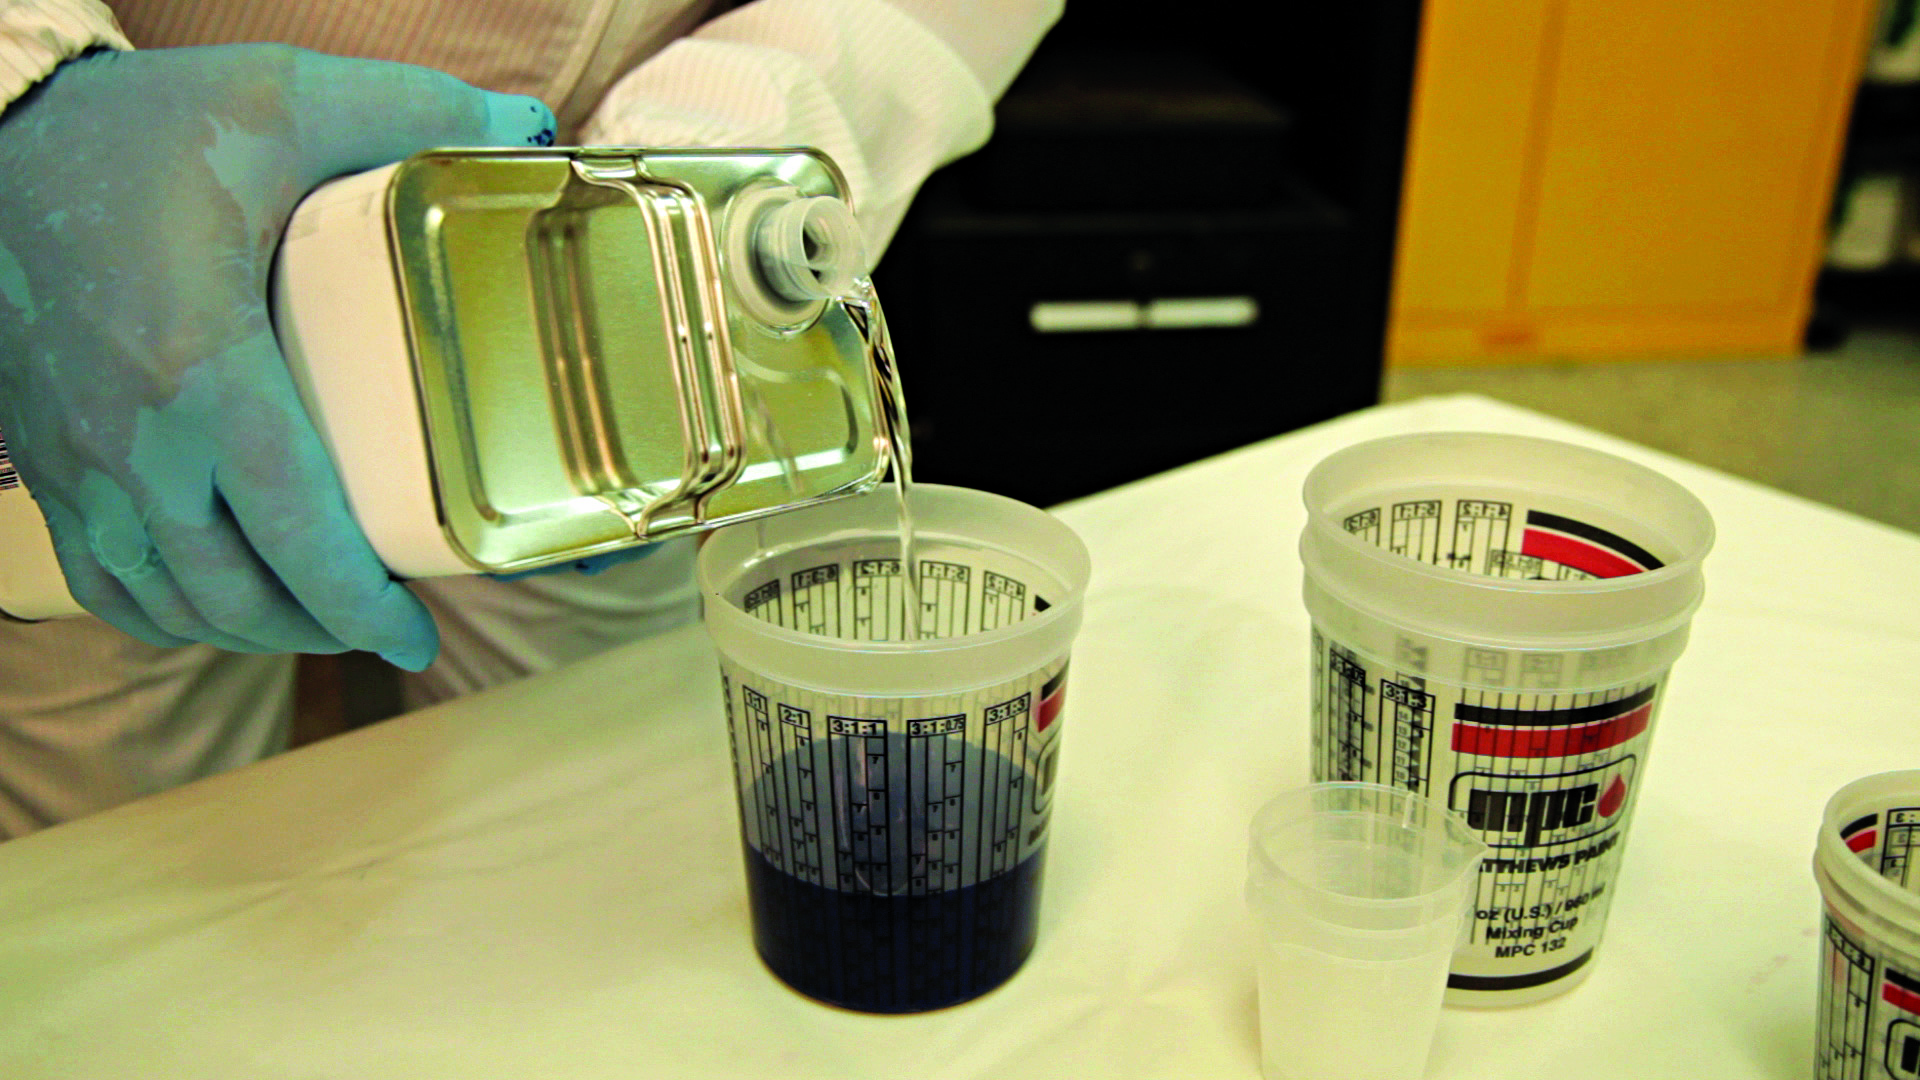
Cups may be available that indicate specific paint mixing ratios on the side.
The basic operating parts of an HVLP paint gun include an air cap, a fluid tip and a fluid needle. The fluid tip will sit behind the air cap and allows the painting fluid to pass through the hole in the gun and be atomized (i.e. reduced to fine particles) by the air cap.
The needle is used to control the amount of fluid passing through the gun. It is adjusted in for less fluid or out for more. The gun’s fan pattern width is also adjustable to determine the shape of the spray. And a digital gauge in the handle will help the user set the air pressure.
The other, conventional style of paint gun is basically the same, except the air pressure is instead controlled at the handle with a diaphragm-type regulator. Many signmakers find the HVLP model’s digital readout an easier way to set the appropriate air pressure.
A paint preparation system (PPS) should be used to load the paint into the gun for spraying. In some cases, the PPS is a hard cup with a disposable liner to hold the paint in. Once the paint is poured in, a cap with an internal strainer is snapped into place, followed by a locking ring, which must be on tight.
The spray gun is then locked to the PPS. Once the connection is secure, the gun is ready to spray paint.
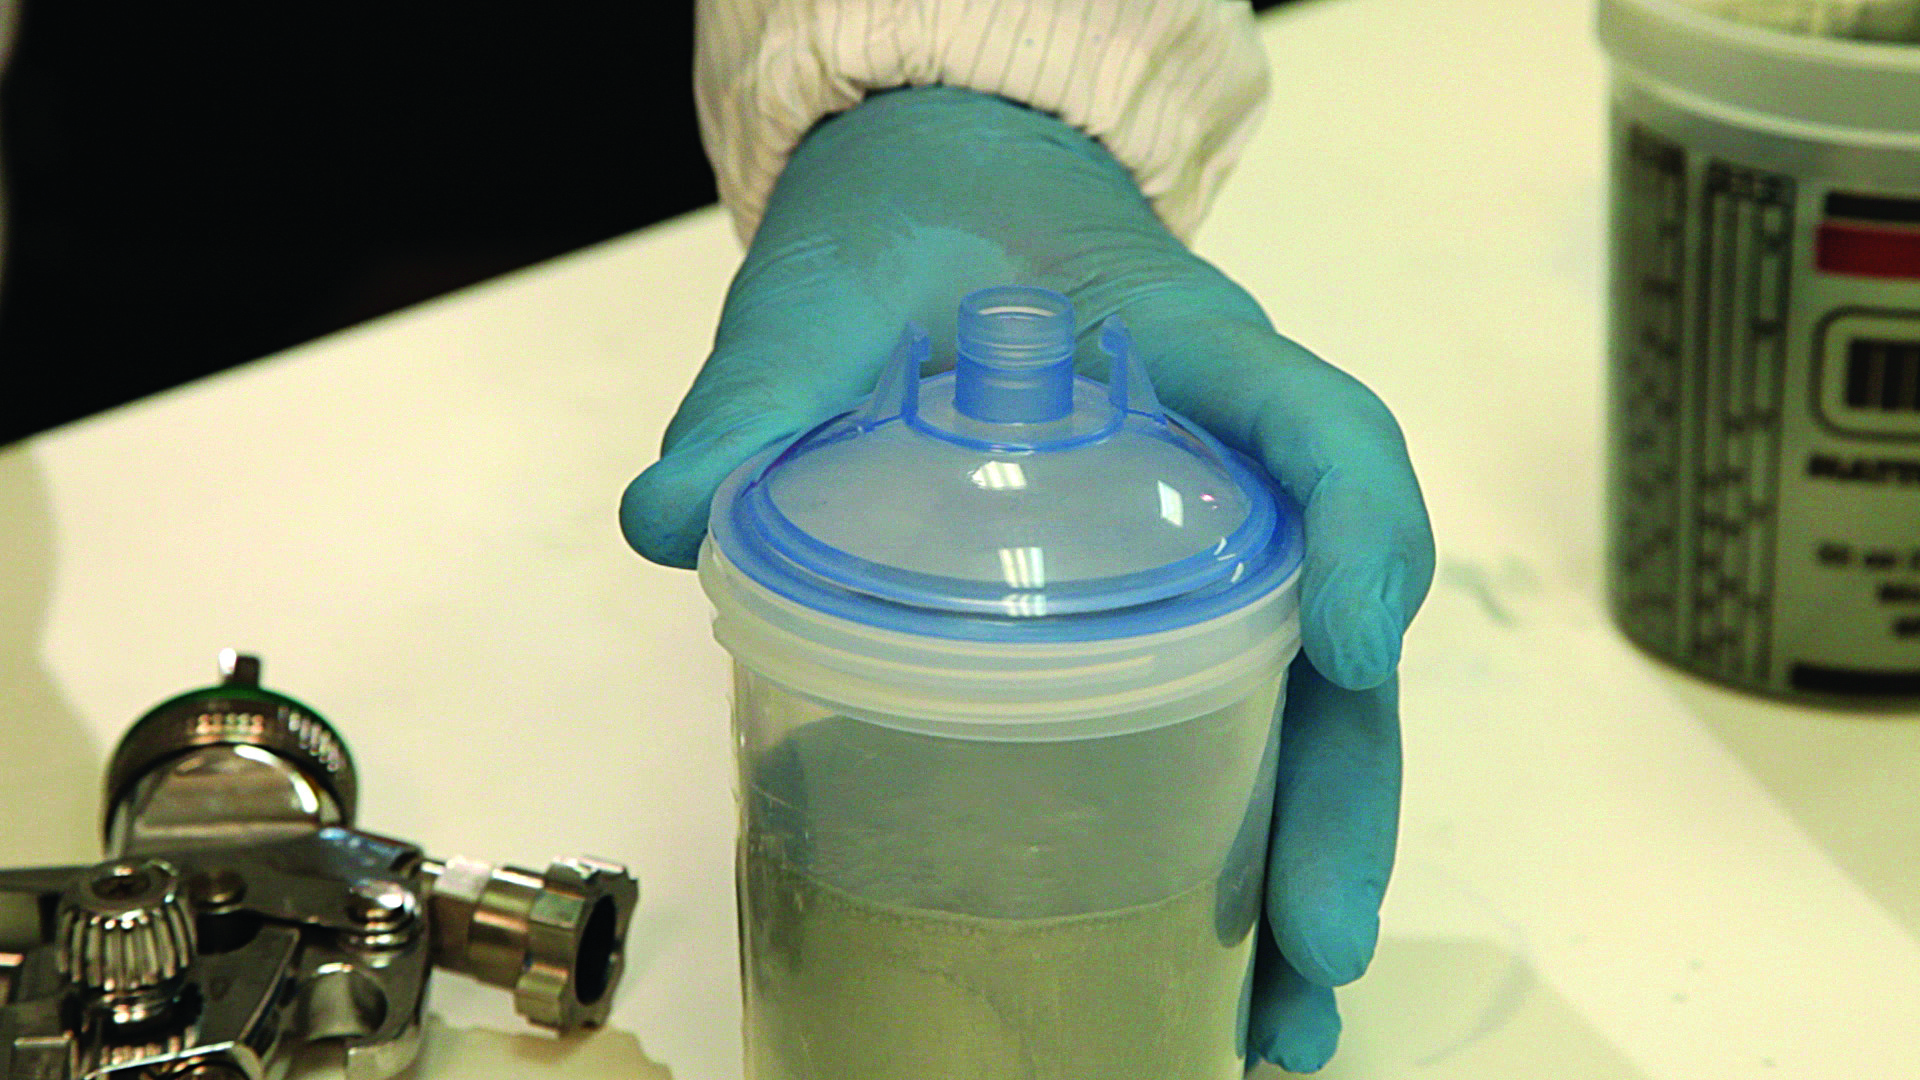
A paint preparation system (PPS) should be used to load the paint into the spray gun. This version is a hard cup with a disposable liner. A cap with an internal strainer is snapped into place, followed by a locking ring, and then it is attached to the spray gun.
Spraying the paint
The paint gun’s fan pattern should initially be fully opened, then closed just a little, with fluid control set at around 75 or 80 per cent. Appropriate air pressure is around 152 kPa (22 psi). All of the settings should be the same whether painting interior or exterior signs.
Since the sign’s braille dots, letters, numbers and other characters are raised, it is important to make sure the paint reaches all of their edges, as well as the edges of the sign panel itself. This will require multiple passes with the paint gun, including one down each side, one from the top and one from the bottom. It may take some practice to angle the gun in the right position for each pass, while also being careful not to allow too much buildup of paint in any area.
After these edge passes, it is time to paint the sign face itself. Again, it is important not to overload the surface.
Transparent and translucent sign panel materials can be painted on the second surface (i.e. rear side) instead, but they will need a clearcoat applied to the first surface (front). While that may sound like extra work, the advantage of this approach is there are no letters to deal with when painting, just a flat surface. The back of an acrylic sign panel can be given a medium coat of wet paint, applied directly with no need for sanding or an adhesion promoter.
With regard to overloading a surface, it may be better to spray too little and then pause to check the paint’s thickness. If there is enough paint already, then the job is done. If more is needed, on the other hand, the signmaker will need to wait for 10 to 15 minutes of flash drying time before adding a second coat. When a sign is hit too soon with a second coat, its surface can ‘solvent pop.’ This should be avoided.
Similarly, when painting the second surface instead of the first, it is important to wait 10 to 15 minutes after the initial coat before applying another. One option for this scenario is to paint the rear side first, then turn the panel around to clearcoat the front while the back dries.
Two coats are always recommended for outdoor signs. An indoor sign could probably get away with a single coat, but then it is all the more important to check the thickness of that coat.


