Painting photopolymer panels
by all | 22 November 2013 8:30 am
 [1]
[1]Photos courtesy Nova Polymers
By Dave Miller
As photopolymers become the industry-standard material for braille and other tactile characters in accessibility signage systems, sign fabricators need to develop best practices for preparing them. Painting photopolymer-based signs, especially, will significantly expand the selection of colours and finishes available for sign designers. A clear topcoat will also be required for those signs that are subsurface-decorated with paint, digitally printed graphics or patterns in the base substrate.
The photopolymer sign painting process includes many steps, including initial safety precautions, cleaning the substrate, paint mixing techniques, spraying with a paint gun and checking the results with a wet film gauge.
Safety first
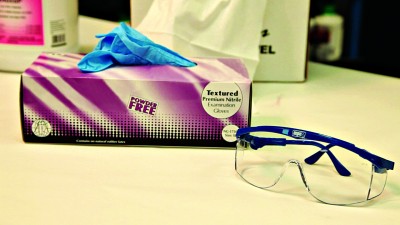
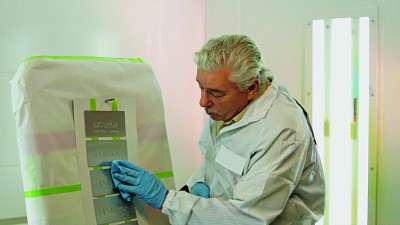
Before painting any substrate, it is imperative to use the proper safety equipment. Whoever will be painting the sign should wear safety glasses (or a full mask) and protective solvent-resistant gloves.
 [2]
[2]Whoever will paint the sign should wear safety glasses and protective solvent-resistant gloves.
Cleaning the substrate
To prepare the photopolymer substrate for painting, the material should first be treated with specific cleaners that are low in volatile organic compounds (VOCs) and are designed for ‘plastic prep.’ All photopolymer signs can be cleaned the same way, whether they are intended for indoor or outdoor installation.
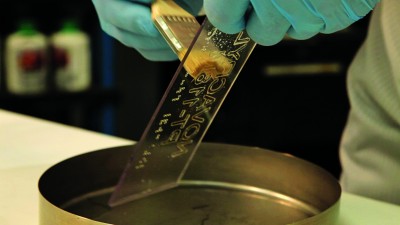
A squirt bottle can be used to saturate the sign surface with the cleaner, followed by a short-bristle brush to clean all of the areas around the sign’s copy (i.e. text). It is important to clean out any debris that may have lodged into the copy area and blow it away.
The same process is then repeated for the sign’s ‘second surface’ (i.e. the rear side). It is also important to leave none of the cleaning fluid behind on the surface before painting. Once it has been cleared, the substrate will be ready for a topcoat.
Cleaning the sign is one of the easier steps, but it must be done thoroughly. Right before painting, for example, a tack rag should be used with a soft, gentle touch, to remove any new surface dust that may have settled after the sign panels were cleaned.
 [3]
[3]It is important to clean out any debris that may have settled in and around the sign copy.
Mixing the paint
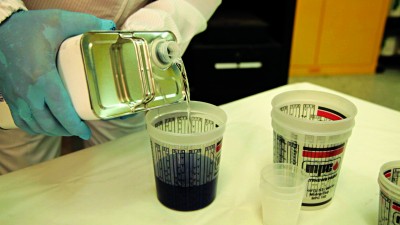
The next step is to mix the paint correctly. It is best to check the specific mixing ratios with the paint manufacturer. In some cases, a mixing cup will indicate these ratios on the side, like measurements on a measuring cup.
The mixing process combines paint with a catalyst and reducer. The crosslinking of the catalyst to the resin system will force the paint to dry and cure, while the reducer will thin down the viscosity to help control the paint’s ability to flow over the substrate when it is eventually sprayed onto the sign in a paint booth. A typical ratio involves three parts paint, one part catalyst and one part reducer.
Once these ingredients have been poured into the same cup, they should be stirred thoroughly with a stick for about 30 to 60 seconds.
Preparing the paint gun
To ensure the newly mixed paint can be sprayed properly onto the substrate, the next step is to make sure the paint gun is ready. There are two types of spray guns in today’s market: conventional and high-volume, low-pressure (HVLP) models.
 [4]
[4]Cups may be available that indicate specific paint mixing ratios on the side.
The basic operating parts of an HVLP paint gun include an air cap, a fluid tip and a fluid needle. The fluid tip will sit behind the air cap and allows the painting fluid to pass through the hole in the gun and be atomized (i.e. reduced to fine particles) by the air cap.
The needle is used to control the amount of fluid passing through the gun. It is adjusted in for less fluid or out for more. The gun’s fan pattern width is also adjustable to determine the shape of the spray. And a digital gauge in the handle will help the user set the air pressure.
The other, conventional style of paint gun is basically the same, except the air pressure is instead controlled at the handle with a diaphragm-type regulator. Many signmakers find the HVLP model’s digital readout an easier way to set the appropriate air pressure.
A paint preparation system (PPS) should be used to load the paint into the gun for spraying. In some cases, the PPS is a hard cup with a disposable liner to hold the paint in. Once the paint is poured in, a cap with an internal strainer is snapped into place, followed by a locking ring, which must be on tight.
The spray gun is then locked to the PPS. Once the connection is secure, the gun is ready to spray paint.
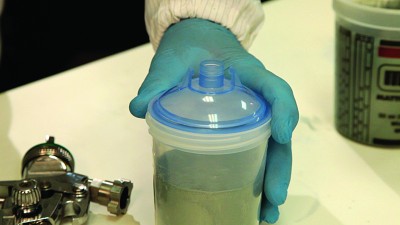 [5]
[5]A paint preparation system (PPS) should be used to load the paint into the spray gun. This version is a hard cup with a disposable liner. A cap with an internal strainer is snapped into place, followed by a locking ring, and then it is attached to the spray gun.
Spraying the paint
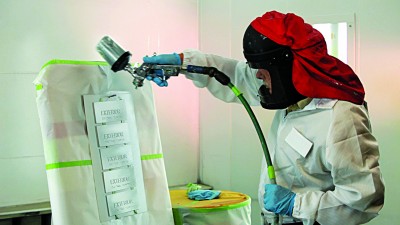
The paint gun’s fan pattern should initially be fully opened, then closed just a little, with fluid control set at around 75 or 80 per cent. Appropriate air pressure is around 152 kPa (22 psi). All of the settings should be the same whether painting interior or exterior signs.
Since the sign’s braille dots, letters, numbers and other characters are raised, it is important to make sure the paint reaches all of their edges, as well as the edges of the sign panel itself. This will require multiple passes with the paint gun, including one down each side, one from the top and one from the bottom. It may take some practice to angle the gun in the right position for each pass, while also being careful not to allow too much buildup of paint in any area.
After these edge passes, it is time to paint the sign face itself. Again, it is important not to overload the surface.
Transparent and translucent sign panel materials can be painted on the second surface (i.e. rear side) instead, but they will need a clearcoat applied to the first surface (front). While that may sound like extra work, the advantage of this approach is there are no letters to deal with when painting, just a flat surface. The back of an acrylic sign panel can be given a medium coat of wet paint, applied directly with no need for sanding or an adhesion promoter.
With regard to overloading a surface, it may be better to spray too little and then pause to check the paint’s thickness. If there is enough paint already, then the job is done. If more is needed, on the other hand, the signmaker will need to wait for 10 to 15 minutes of flash drying time before adding a second coat. When a sign is hit too soon with a second coat, its surface can ‘solvent pop.’ This should be avoided.
Similarly, when painting the second surface instead of the first, it is important to wait 10 to 15 minutes after the initial coat before applying another. One option for this scenario is to paint the rear side first, then turn the panel around to clearcoat the front while the back dries.
Two coats are always recommended for outdoor signs. An indoor sign could probably get away with a single coat, but then it is all the more important to check the thickness of that coat.
Using the wet film gauge
Checking whether or not paint coverage is sufficient is where the wet film gauge comes into play. With the paint gun put aside, the gauge can be used to take a film thickness reading.
The wet film gauge features edge tabs at various levels, allowing it to measure the coating’s thickness from 0.025 to 0.2 mm (1 to 8 mils). When one of the edges is placed into the wet paint, it will leave an impression in the film; and when the gauge is removed, it will indicate the film’s width. For a photopolymer accessibility sign, the user will want to see at least 0.1 mm (4 mils) of wet film, which will reduce to 0.038 to 0.05 mm (1.5 to 2 mils) when fully dry.
To more specifically determine the eventual dry film’s thickness is a question of the paint’s solid content. In the aforementioned example, if the paint is 50 per cent solid, the film will lose the other 50 per cent of its wet width, drying from 0.1 mm (4 mils) to 0.05 mm (2 mils). So, it is a simple matter of math to know how thick the wet film should be to achieve the desired dry film thickness.
 [6]
[6]Right before painting, a tack rag applied with a soft, gentle touch will remove any new surface dust that may have settled on the sign panels.
Cleaning up
After spraying paints and checking the results, it is time to clean the equipment. One of the advantages of using a PPS is it makes it easier to clean the paint gun.
First, the gun is removed from the PPS and flushed to clean it out. When it is simply a matter of changing out the colour of the paint, the gun can be flushed quickly, but when the spray painting is finished for the day, the cleaning will need to be more thorough. The air cap and fluid needle should be carefully removed. Most spray gun manufacturers also provide a special tool to remove the fluid tip; it should never be removed using pliers or any similar tool.
When flushing out the gun, it is a good idea to brush at the same time. After the internal parts are clean, it is time to clean the removed fluid tip, air cap and fluid needle separately. There will be a lot of paint buildup on the outside of the fluid tip, but it will need to be brushed inside, too.
After these components have all been washed and brushed, the gun can be reassembled. The fluid tip should be attached first to prevent bending the needle upon installation. Using the aforementioned tool, the fluid tip should be fitted snugly, but not too tight. Then the needle can be attached with its spring and adjustment knob. Before reattaching the air cap, the user should check to make sure the gun has trigger action again. Finally, the reassembled paint gun will need to be wiped with a solvent-based cleaner.
Dave Miller is business director for Nova Polymers. With files from Matthews Paint. For more information, visit www.novapolymers.com[7] and www.matthewspaint.com[8].
- [Image]: http://www.signmedia.ca/wp-content/uploads/2014/01/Photo_04_REV.jpg
- [Image]: http://www.signmedia.ca/wp-content/uploads/2014/01/Photo_06.jpg
- [Image]: http://www.signmedia.ca/wp-content/uploads/2014/01/Photo_09.jpg
- [Image]: http://www.signmedia.ca/wp-content/uploads/2014/01/Photo_02.jpg
- [Image]: http://www.signmedia.ca/wp-content/uploads/2014/01/Photo_10.jpg
- [Image]: http://www.signmedia.ca/wp-content/uploads/2014/01/Photo_13_REV.jpg
- www.novapolymers.com: http://www.novapolymers.com
- www.matthewspaint.com: http://www.matthewspaint.com
Source URL: https://www.signmedia.ca/painting-photopolymer-panels/