
Hanger bolt
The hanger bolt method works quite well for smaller, lighter panels.
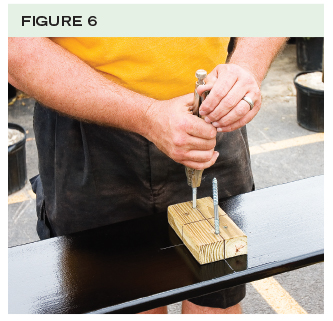
Assuming each panel should have the same standoff distance, this process begins with the fastening of pressure-treated 51 x 102-mm (2 x 4-in.) blocks to the back of the sign panels with deck screws and then using locking pliers to secure hanger bolts in pre-drilled holes (Figure 6). On the other hand, if the standoff distance is not a concern, then the hanger bolts can be secured directly into pre-drilled pilot holes in the panel.
Careful measurements must be taken for the locations of the bolts. One option is to produce a template of their positions.
After the holes are drilled to be twice the diameter of the bolt and the dust is removed, a ‘dry fit’ is attempted to determine if any further adjustments will be needed. Finally, the holes are filled with 100 per cent silicone and the panel is inserted with equal pressure from each side. The result is a clean installation, with no marring of the panel surfaces, no visible hardware and an appropriate standoff distance (Figure 7).

Post procedures
Post-mounted signs remain a prolific application, with a variety of procedures and devices developed to facilitate their installation.
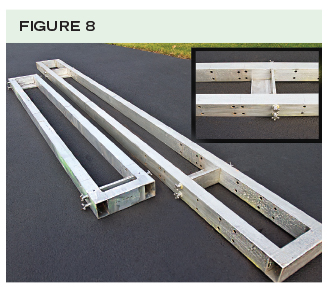
A wooden, calibratible installation jig can help methodically determine the exact placement for post holes to be dug, including the precise positioning of the posts once they are placed in those holes. Other options include aluminum jigs for large or small panels. Holes are drilled into the jigs as needed, to accommodate various sizes of sign panels (Figure 8).
Each jig has two adjustable slider platforms that sit on top of the sign posts. They are calibrated before the sign installation by measuring the width of the panel—e.g. 1.5 m (5 ft)—and adding 0.4 m (15 in.). The resulting figure—e.g. 1.9 m (75 in.)—is the ‘outside to outside’ distance of the posts. This distance includes the width of the panel, 51 mm (2 in.) on either side of the panel and each of the 140-mm (5.5-in.) wide posts.
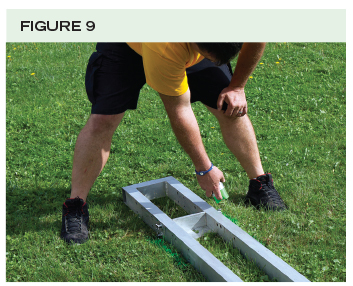
As mentioned, the jig is used to indicate where the holes are to be dug into the ground (Figure 9). Also, after the holes are dug (Figure 10) and the posts are inserted into them, the jig is placed atop the posts to ensure they have been properly spaced and are level (Figure 11).

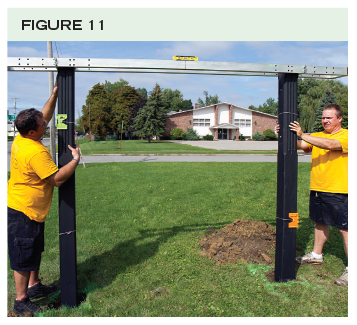
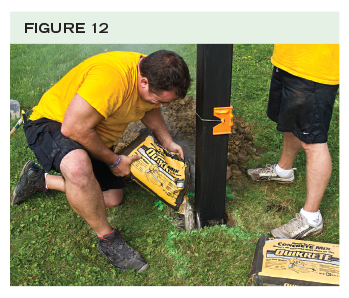
A dry cement mix is then used to firm up the posts (Figure 12). This will let the groundwater eventually produce a hard cement pond. At this point, the jig is removed.
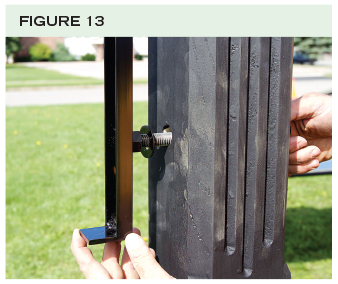
To attach the sign panel to the posts, ‘channel’ brackets are recommended, custom-designed for each new panel. The brackets should be made of powdercoated, industrially baked aluminum, which will not rust. At the base of each bracket is a ‘shoe,’ on which the weight of the panel will rest during and after the installation.
The brackets are fit around the end-grain of the sign substrate, which should also be pre-grooved to fit in the channel. Stainless steel lag screws are used to affix the brackets to the panel. Then the brackets are affixed to the posts with threaded rods, which are welded to the brackets (Figure 13).


Some people have interest in doing wooden work at home by their own. Table saw is the best thing for them. Through this, people can do small work on their own.
Sharp Reviews