Sign Installation: Techniques for fascia and post-mounted signs
by all | 31 May 2013 8:30 am
 [1]
[1]Photos courtesy Signs of Gold
By Francis S. Lestingi
No matter how technological the sign industry becomes, there will still be magic in the artistry of hand-crafting wood. Most of these signs are either wall-mounted (i.e. fascia signs) or post-mounted, each requiring its own installation techniques.
Facing fascia
With traditional fascia signs that are hand-carved from mahogany or other wood panels and then gold-leafed, it is recommended to use ‘hidden’ installation hardware, so as to avoid piercing or puncturing these intricate panels with any drilling or perforations.
Two methods for accomplishing this are a French cleat and a hanger bolt. Some fascia installations will use both techniques because they involve multiple panels.
French cleat
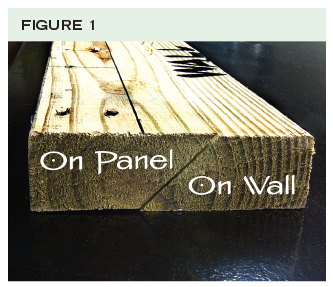
The French cleat is suitable when the panel is heavy and large. To prepare it, a table saw is first used to cut a 51 x 203 x 203-mm (2 x 8 x 8-in.) pressure-treated board down the middle at a 45-degree angle (see Figure 1). The half with the ‘down’ angle is attached to the back of the sign panel with deck screws. The other half is fastened to the wall, such that the ‘up’ angle is ready to receive the interlocking ‘down’ angle (Figure 2).
 [2]
[2]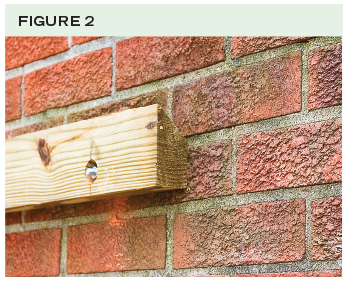 [3]
[3]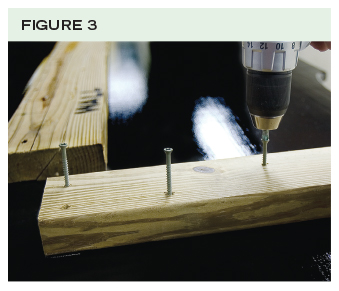 [4]
[4]To stabilize the panel, spacers are attached to each side, using pressure-treated 51 x 102-mm (2 x 4-in.) lumber (Figure 3). The cleat and spacers should provide an attractive standoff for the panel of approximately 38 mm (1.5 in.).
Before securing the cleat to the wall, however, it must be prepared by pre-drilling pilot holes and counter-sinking to accommodate the fasteners. When installing a sign on a brick wall, expansion bolts should be used, which are different from hanger bolts.
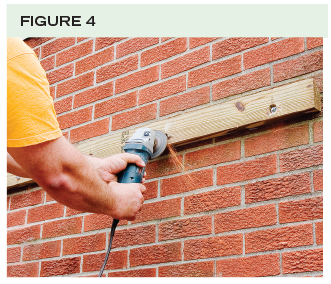
After the appropriate measurements are taken, the cleat should be secured to the wall by using a power hammer drill. As the expansion bolts are ratcheted into the wall, they will expand along the shaft and thus tightly grip onto the brick. While the shaft is expanding, the threaded posts progress outward; they must be levelled off with a grinder (Figure 4).
Once this is done, the wall cleat is ready to accept the sign panel cleat. As a final step, the two cleats are fastened together by ratcheting lag screws into pre-drilled holes (Figure 5).
 [5]
[5]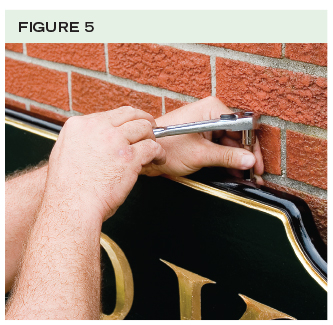 [6]
[6]Hanger bolt
The hanger bolt method works quite well for smaller, lighter panels.
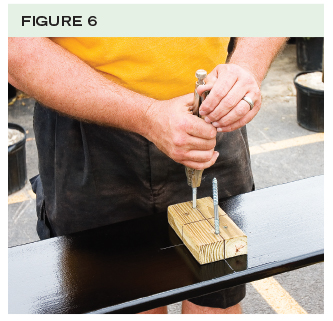
Assuming each panel should have the same standoff distance, this process begins with the fastening of pressure-treated 51 x 102-mm (2 x 4-in.) blocks to the back of the sign panels with deck screws and then using locking pliers to secure hanger bolts in pre-drilled holes (Figure 6). On the other hand, if the standoff distance is not a concern, then the hanger bolts can be secured directly into pre-drilled pilot holes in the panel.
Careful measurements must be taken for the locations of the bolts. One option is to produce a template of their positions.
After the holes are drilled to be twice the diameter of the bolt and the dust is removed, a ‘dry fit’ is attempted to determine if any further adjustments will be needed. Finally, the holes are filled with 100 per cent silicone and the panel is inserted with equal pressure from each side. The result is a clean installation, with no marring of the panel surfaces, no visible hardware and an appropriate standoff distance (Figure 7).
 [7]
[7] [8]
[8]Post procedures
Post-mounted signs remain a prolific application, with a variety of procedures and devices developed to facilitate their installation.
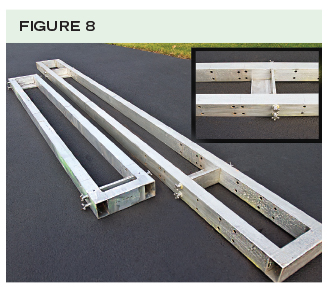
A wooden, calibratible installation jig can help methodically determine the exact placement for post holes to be dug, including the precise positioning of the posts once they are placed in those holes. Other options include aluminum jigs for large or small panels. Holes are drilled into the jigs as needed, to accommodate various sizes of sign panels (Figure 8).
Each jig has two adjustable slider platforms that sit on top of the sign posts. They are calibrated before the sign installation by measuring the width of the panel—e.g. 1.5 m (5 ft)—and adding 0.4 m (15 in.). The resulting figure—e.g. 1.9 m (75 in.)—is the ‘outside to outside’ distance of the posts. This distance includes the width of the panel, 51 mm (2 in.) on either side of the panel and each of the 140-mm (5.5-in.) wide posts.
As mentioned, the jig is used to indicate where the holes are to be dug into the ground (Figure 9). Also, after the holes are dug (Figure 10) and the posts are inserted into them, the jig is placed atop the posts to ensure they have been properly spaced and are level (Figure 11).
 [9]
[9]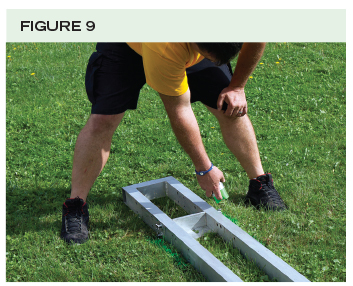 [10]
[10] [11]
[11]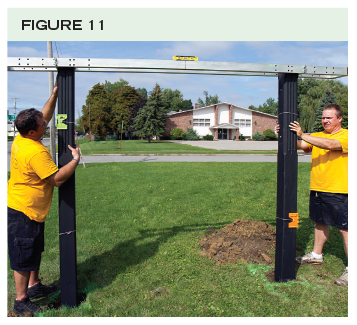 [12]
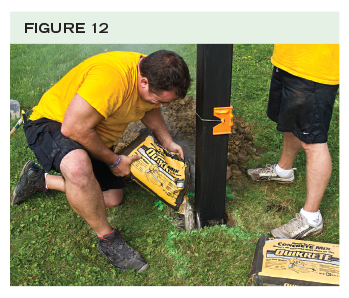
[12]A dry cement mix is then used to firm up the posts (Figure 12). This will let the groundwater eventually produce a hard cement pond. At this point, the jig is removed.
To attach the sign panel to the posts, ‘channel’ brackets are recommended, custom-designed for each new panel. The brackets should be made of powdercoated, industrially baked aluminum, which will not rust. At the base of each bracket is a ‘shoe,’ on which the weight of the panel will rest during and after the installation.
The brackets are fit around the end-grain of the sign substrate, which should also be pre-grooved to fit in the channel. Stainless steel lag screws are used to affix the brackets to the panel. Then the brackets are affixed to the posts with threaded rods, which are welded to the brackets (Figure 13).
 [13]
[13]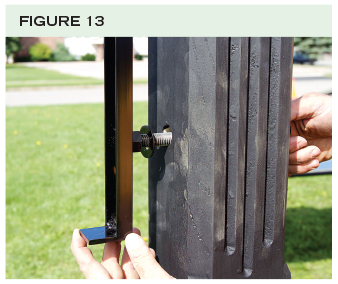 [14]
[14]The 140 x 140-mm (5.5 x 5.5-in.) treated posts need pre-drilled holes to accept the threaded rods, nuts and washers. The posts can also be detailed with fluting (i.e. ornamental grooves), chamfering (i.e. bevelling edges) and roundovers (i.e. softening sharp edges). Since they are treated, they will not accept paint, so they should instead be stained twice with solid colours.
After the brackets are attached to both the panel and the posts, the result is a ‘floating’ substrate, since the panel is not in direct contact with the posts. There should be about 51 mm (2 in.) between each edge of the panel and each post. This no-contact arrangement is beneficial in preventing problems associated with weathering.
 [15]
[15]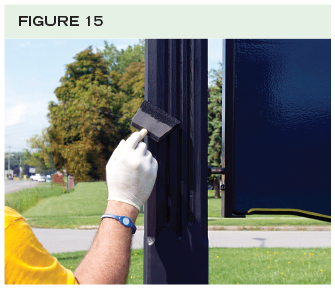 [16]
[16] [17]
[17]The floating concept for panels is also helpful when working on them in the shop and transporting them to the installation site. Whether a panel is one- or two-sided, it is a good idea to attach two or more custom-made steel ‘handles’ to each end-grain on the substrate when the panel is in production. This practice allows them to be flipped and transported without fear of damage to the surface or to any protruding appliqués.
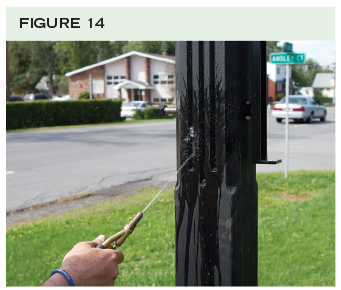
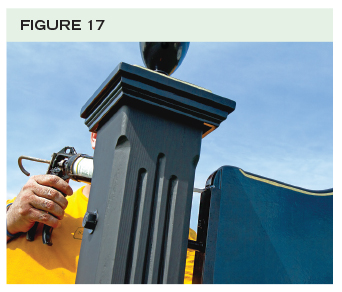
Sign posts will inevitably get dusty during the installation process, so after they are affixed and in the ground, they should be cleaned with water (Figure 14) and given another coat of stain to keep them looking freshened up (Figure 15). The final steps will include some paint touch-ups on the hardware (Figure 16), a little silicone on the bracket tops (Figure 17), affixing the finials (i.e. ornamental finishing) and caps (Figure 18) and the addition of the sign shop’s nameplate. The installation is then complete (Figure 19).
 [18]
[18]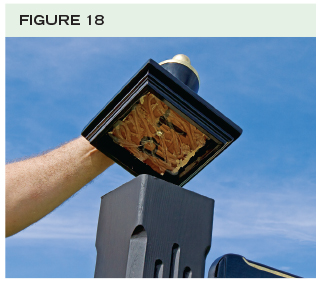 [19]
[19] [20]
[20]Francis S. Lestingi owns and manages Signs of Gold, specializing in hand-carved, gilded wooden signs. For more information, visit www.signsofgold.com[21].
- [Image]: http://www.signmedia.ca/wp-content/uploads/2014/01/13_InsertPanel.jpg
- [Image]: http://www.signmedia.ca/wp-content/uploads/2014/01/Figure-1.jpg
- [Image]: http://www.signmedia.ca/wp-content/uploads/2014/01/Figure-2.jpg
- [Image]: http://www.signmedia.ca/wp-content/uploads/2014/01/Figure-3.jpg
- [Image]: http://www.signmedia.ca/wp-content/uploads/2014/01/Figure-4.jpg
- [Image]: http://www.signmedia.ca/wp-content/uploads/2014/01/Figure-5.jpg
- [Image]: http://www.signmedia.ca/wp-content/uploads/2014/01/Figure-6.jpg
- [Image]: http://www.signmedia.ca/wp-content/uploads/2014/01/Figure-7.jpg
- [Image]: http://www.signmedia.ca/wp-content/uploads/2014/01/Figure-8.jpg
- [Image]: http://www.signmedia.ca/wp-content/uploads/2014/01/Figure-9.jpg
- [Image]: http://www.signmedia.ca/wp-content/uploads/2014/01/Figure-10.jpg
- [Image]: http://www.signmedia.ca/wp-content/uploads/2014/01/Figure-11.jpg
- [Image]: http://www.signmedia.ca/wp-content/uploads/2014/01/Figure-12.jpg
- [Image]: http://www.signmedia.ca/wp-content/uploads/2014/01/Figure-13.jpg
- [Image]: http://www.signmedia.ca/wp-content/uploads/2014/01/Figure-14.jpg
- [Image]: http://www.signmedia.ca/wp-content/uploads/2014/01/Figure-15.jpg
- [Image]: http://www.signmedia.ca/wp-content/uploads/2014/01/Figure-16.jpg
- [Image]: http://www.signmedia.ca/wp-content/uploads/2014/01/Figure-17.jpg
- [Image]: http://www.signmedia.ca/wp-content/uploads/2014/01/Figure-18.jpg
- [Image]: http://www.signmedia.ca/wp-content/uploads/2014/01/Figure-19.jpg
- www.signsofgold.com: http://www.signsofgold.com
Source URL: https://www.signmedia.ca/techniques-for-fascia-and-post-mounted-signs/