Tools for increasing graphic production
by Matthew | 19 February 2012 3:33 pm
 [1]
[1]Photos courtesy Esko
By Bill Hartman
The wide-format printing market has changed with the proliferation of digital devices. Buyers have already reacted to the industry’s new capabilities by seeking greater cost efficiencies. Many print runs have become shorter, more files are sent to a raster image processor (RIP), ‘versioning’ (customization) of graphics is becoming more common and there is greater pressure for quick turnarounds.
This pressure is in part because buyers are aware the speed of wide-format inkjet printing itself has increased. Not long ago, the wait time for digital printing caused production backlogs in many shops. Today, however, digital devices have just about caught up with all other production processes. So, for an increasing number of sign shops, production logjams are moving from the printing stage to the ‘front’ and ‘back’—i.e. to preproduction workflow and job finishing (e.g. cutting). This trend will continue to affect many shops in the near future.
There are still tremendous opportunities for productivity to meet and exceed customer demand. To combat delays and even the playing field with other processes, it is vital to co-ordinate the preparation, printing and cutting workflow for wide-format graphics.
If a job is not printed correctly, after all, it cannot be cut correctly. So, cutting instructions for graphics, for example, need to be co-ordinated with registration marks.
A print service provider (PSP) who can ‘design to print to cut’ effectively can produce better work, faster and less expensively.
 [2]
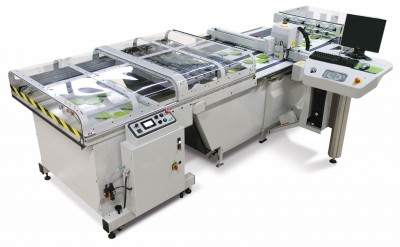
[2]A dedicated workflow should co-ordinate multiple processes, from design to print to cut.
Finishing tables
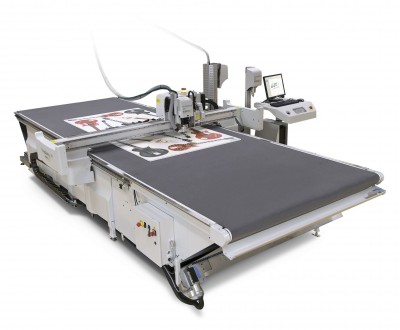
With respect to finishing, most print shops do not buy a cutting table unless they are producing large quantities of graphics; instead, they will do the work by hand or enlist the help of a subcontractor. There are good reasons, however, for print providers to automate in-house finishing.
The primary purpose for this change is to increase capacity, so more work can get done, but another reason is to broaden the range of materials and shapes that can be finished effectively. Acrylics, for example, are difficult to work with manually. Contoured shapes using cuts that are not straight lines are also very difficult—and sometimes impossible—to complete by hand.
With a combination of software and hardware tools, print providers can design and create more complexly contoured two-dimensional (2-D) and three-dimensional (3-D) projects for their customers.
Most PSPs look for a cost-effective, multi-purpose machine that can cut, rout, crease and score their graphics. Through-cuts, kiss-cuts and oscillating-cuts have found widespread use. Shops that need to cut and fold thicker boards for point-of-purchase (POP) and event displays are wise to invest in a v-notch knife.
It is very common for shops to print and cut 1.2 x 2.4-m (4 x 8-ft) or 1.5 x 3-m (5 x 10-ft) boards, but their speed varies with the volume of their output. If a company has invested in a middle-of-the-road printer, that may dictate an average finishing table, but a faster printer will call for a faster table. Automated feed and take-up capabilities can further improve the productivity of a machine.
 [3]
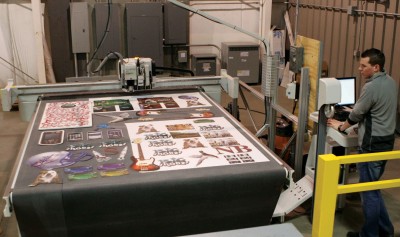
[3]Automating in-house finishing can broaden the range of materials and shapes a sign shop offers.
As wide-format digital inkjet printers only continue to become faster, the challenge is to ensure finishing tables keep pace. Even manufacturers whose printers already produce 70 to 80 high-quality graphic boards per hour expect these numbers to increase significantly over the next few years.
While the main reasons PSPs purchase finishing tables are usually to bring work in-house, increase capacity, ease bottlenecks and deliver faster turnaround times, the technology can also help them move beyond cutting simple square and rectangular signs and displays. Many companies focus on these traditional jobs, but as a consequence are stuck producing low-margin output.
A finishing table’s broader capabilities can help differentiate a PSP’s business from competitors by moving into higher-value creative work with increased margins. It is possible to handle a broader range of substrate materials, perform a wider variety of cuts and finish graphics in any kind of shape, moving from 2-D contour-cut prints to 3-D displays, including stands, tables, chairs, boxes and podiums.
A creative shop can find limitless opportunities with today’s variety of materials and, instead of charging per square foot of printing as a commodity, can begin to charge on a more lucrative per-unit basis.
 [4]
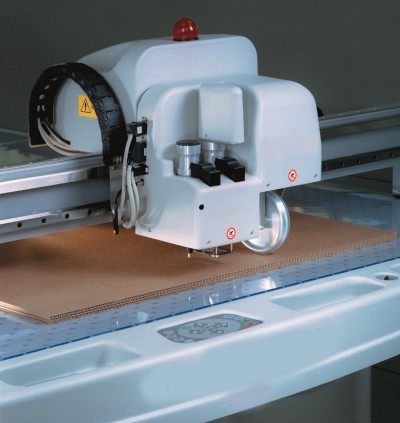
[4]Cutting paths need to be co-ordinated to prevent finishing mistakes.
Upfront workflow
For today’s PSPs to stay profitable, it is important to keep their wide-format digital presses running, i.e. to ‘feed the beast.’ As mentioned, they are seeing more and more files come in from customers requesting shorter and shorter runs—and expecting them more quickly. While many of these shops have made significant investments in wide-format equipment, however, they are not necessarily using dedicated ‘design to print to cut’ workflow tools yet to eliminate wasted time.
While such workflows are more common in the commercial printing sector, operations there are very different from those encountered by wide-format print shops when producing signs and displays. Pre-flighting, graphic layout and other aspects of workflow need to be automated with the realities of the sign business in mind.
Pre-flightingUnlike much of the commercial printing world, wide-format print workflows are not standardized. They do not use a uniform file type from print buyers, for example, such as Portable Document Format (PDF). Rather, the industry has come to accept a wide range of file formats from an assortment of applications.
As a result, the manual pre-press work to prepare artwork can take up valuable time. And unfortunately, shops producing signs and displays often receive files that have not been properly prepared, with errors or missing information. When there is a lack of effective communication with customers, these errors appear too late, often after the RIP or even the print.
Pre-flighting is the most logical starting point for this workflow. A good pre-flighting system will create and use PDF files throughout the process. It will detect any errors, generate a professional report and enable the fixing of these errors.
 [5]
[5]Specialized software can analyze irregular graphic shapes and determine the most efficient layout.
 [6]
[6]
In the best scenarios, the PSP can edit the PDF files in-house, rather than have to return them to the print buyer to determine why any errors are preventing proper RIPs and prints. In these ways, the PSP can reduce reprints for faulty files and streamline its pre-press operations.
Cutting paths
Finishing mistakes are costly, with expensive printed boards tossed away. So, a print shop needs to prevent front-to-back graphic misregistration, as well as compensate for any errors in print or media registration when the graphic reaches the cutting table. A good workflow will provide communications to co-ordinate what the printer prints and what the cutter cuts.
Any time a graphic is to be cut on the table, it needs to come with instructions for how this will be done. In its simplest form, a cutting path can be generated in the original graphic design software, e.g. Adobe Illustrator—but if the cutting system is complex, a lot more can be accomplished within the workflow. Clients cannot be expected to ‘tile’ a job or prepare irregular shapes properly.
In some cases, a new cutting path needs to be added, because the original path is either not present or of poor quality. Many clients do not add ‘bleeds’ to the edges of their artwork, for example, which could result in the colour of the substrate showing through if there are any distortions in the print.
A good workflow can quickly create a cutting path, offer options to clean or smooth out the edges, automatically create bleeds and tile both regular and irregular shapes.
Further, a cutting workflow with layout programming capabilities can help save on substrate material costs, as it will efficiently gang artwork together on a sheet, through a process called ‘nesting,’ to reduce wasted space and get the most use out of each sheet. Specialized software can analyze various rectangles, irregular shapes, double-sided jobs and oversized graphics and then determine the most cost-efficient layout.
If multiple images can be nested efficiently on a single piece of material, it may well mean good-sized pieces are saved to be used for future jobs. If not, the cuts are still programmed to ensure waste is minimized.
 [7]
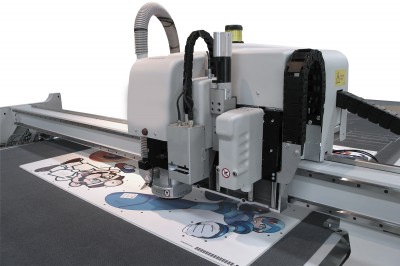
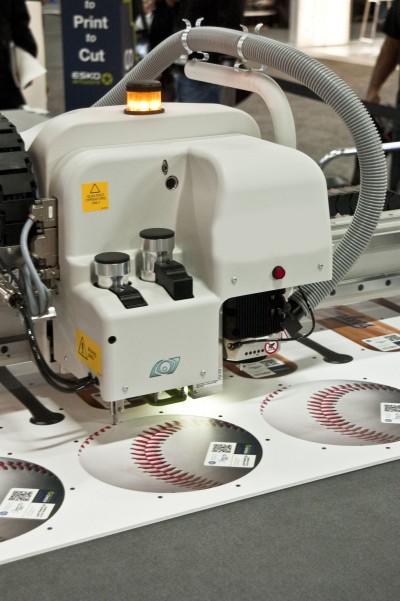
[7]Vision control systems ensure all contoured pieces are cut cleanly.
There is also the question of optimizing time, as nesting artwork efficiently means there are fewer boards to be printed and cut, so both the printer and cutting table are less taxed.
Vision control
The next step in the workflow is for the software to work seamlessly with the vision control system on the finishing table to ensure all contoured pieces are cut cleanly, even if they have been placed off-kilter. Cutting has become quite complex, requiring an awareness of the substrate and the appropriate tools to get the job done.
Vision control is necessary for digital finishing systems because all printed graphic materials entail distortions in size, rotation and scaling that could lead to inaccurate die cutting if not corrected. This capability is even more crucial for difficult contour cuts.
Some digital systems can creatively decrease the number of registration marks read from a sheet throughout the finishing process, so as to reduce the amount of time needed to cut the sheet, without sacrificing accuracy.
The finishing specifications are based on cutting ‘keys’ that supply optimized tool settings, preset parameters and blade and bit recommendations for table operators, which makes the finishing setup easier by simplifying the various tasks involved for each unique job. In many cases, setup is virtually eliminated.
Continued automation
Workflow automation is introduced to eliminate manual steps from print shops’ production processes; it is particularly helpful for repetitive tasks that can be charted out easily and do not need the personal attention of a human operator.
The trend lends itself to standardization, whereby these shops use the same setups and parameters for each file. This way, less human interference can mean a reduction of errors.
That said, messages can also be automatically sent to keep print shop staff aware of where a specific job is within the production process. Automation can even help deliver proofs to print buyers for approval.
So, while many shop owners have in the past considered their digital printers the primary limiting factor dictating production output, there are many ways they can expand their facilities’ capabilities, whether it involves installing an in-house finishing system or implementing a more effective workflow. These changes can in turn lead to increased demand for more profitable work.
Bill Hartman is vice-president (VP) of digital finishing business development for Esko, which provides pre-press and finishing software and hardware. For more information, visit www.esko.com[8].
- [Image]: http://www.signmedia.ca/wp-content/uploads/2014/02/EG_Kongsberg-XP-Auto_07.jpg
- [Image]: http://www.signmedia.ca/wp-content/uploads/2014/02/i-XE10A_Final_Stand_Trans-2_edited-1.jpg
- [Image]: http://www.signmedia.ca/wp-content/uploads/2014/02/EG_ThirdDimension_KongsbergXP-2.jpg
- [Image]: http://www.signmedia.ca/wp-content/uploads/2014/02/EG_Kongsberg_XL_03-2.jpg
- [Image]: http://www.signmedia.ca/wp-content/uploads/2014/02/Esko_iXP-2.jpg
- [Image]: http://www.signmedia.ca/wp-content/uploads/2014/02/i-XP_Conveyor_HR-2.jpg
- [Image]: http://www.signmedia.ca/wp-content/uploads/2014/02/iXL-2.jpg
- www.esko.com: http://www.esko.com
Source URL: https://www.signmedia.ca/tools-for-increasing-graphic-production/