
Storage
There are right and wrong ways to store overlaminates and other pressure-sensitive materials, such as application tape and vinyl.
The wrong way is to stack rolls of unboxed overlaminates horizontally. This can create flat spots in the rolls, which can appear as a visible line after the overlaminate is applied to the print.
The right way is to keep the rolls in their boxes and stacked upright until they are needed. (While the corrugated boxes are designed to withstand the rigours of shipping, stacking them horizontally can result in their collapse when overall weight becomes excessive.)
The best storage area is the printing room, ideally at 21 C (70 F) with 50 per cent relative humidity. Under these conditions, overlaminates should have a shelf life of more than one year.
The ideal shop environment is also spotlessly clean. If machinery is cleaned with an air hose, however, dirt or dust can become airborne, settle on the raw materials and eventually become trapped between graphics and overlaminates, which usually results in ‘tenting’ of the laminating film over trapped particles. This is why, as mentioned earlier, laminator’s rollers should be cleaned with a lint-free rag instead.
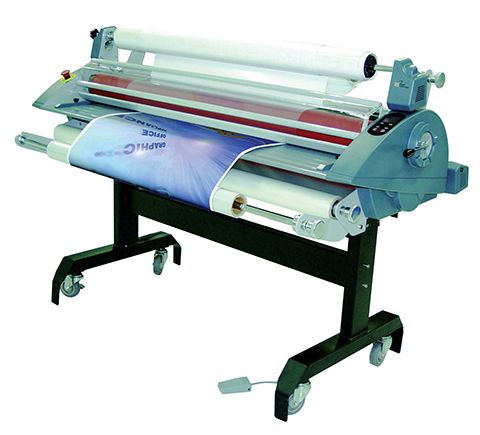
The interaction of inks, substrates, printing and lamination involves complex chemistry. Photo courtesy Royal Sovereign
Drying time
Before an overlaminate film is applied to a print, the ink must be completely dry. If it is not cured, the graphic risks bubbles under the laminate, yellowing of the substrate and the overlaminate and/or migration of solvents through the film into the adhesive, causing adhesion failure.
Print drying time varies, depending on ink density, ambient temperature and humidity. Also, even when a graphic feels dry to the touch, the ink may not yet be completely cured. It is important to consult the manufacturer’s recommendations for drying time and, as a rule of thumb, to wait 24 hours before laminating any print and then to let the laminated print lay flat for another 24 hours before rolling or mounting it.
Threading the laminator
All laminators have different optimal settings. Before threading an overlaminate through a roll laminator, for instance, it is important to study the manufacturer’s diagram(s) for doing so. A laminated print’s finished appearance can be affected by several variables at this stage, including the feed roller’s unwind tension, the nip rollers’ pressure and the laminating speed.
After loading and securing the overlaminate roll on the unwind shaft, the tension on the roll should be low and it should not be able to shift from side to side. As a general rule, the least amount of tension should be used to accomplish the job.
That said, the unwind rollers should not be allowed to ‘free-wheel.’ A slight degree of tension is necessary to ensure the overlaminate feeds evenly into the nip rollers. And some back tension will prevent wrinkling and trapped air bubbles.
If the tension is too high, however, it will stretch the overlaminate. Many stretched films, especially polyester-based ones, have a ‘memory’ and tend to shrink back to their original shape, which can cause a laminate to curl and/or delaminate.
Setup
The laminator’s rolls should be regularly inspected and properly adjusted to ensure they remain in good condition. Otherwise, rolls that are not perfectly smooth and parallel—and where pressure is not consistent—can cause trapped air bubbles, wrinkling and poor adhesion. Adjusting roll pressure for consistency can be frustrating if the machinery uses screws instead of air cylinders for this purpose.
Laminator manufacturers typically recommend periodic testing of the rolls’ ‘footprint,’ which involves positioning sheets of special nip impression transfer paper across the web, closing the hot rolls, removing the sheets and inspecting them. Inconsistent impressions will indicate unevenness in pressure across the web, which can result from concave, convex or canted rolls.


